How to pack a backpack; a beginners guide
Hiking practice
If you have been hiking for a while then chances are you already know how to correctly pack your backpack; but maybe you don’t. In fact there really is no one ‘correct’ way but rather a series of principles that you apply to achieve the best outcome for you as an individual. This article discusses these principles and will hopefully provide you with enough knowledge to successfully assemble your pack in a way that is comfortable and workable for you.
Packing Principles
Every pack, every equipment list, and every hiker, creates a combination that is unique so dictating a single way to assemble your pack will never work. An example of this is while most hikers you see on the trail will pack their shelter inside their pack I actually prefer to have my shelter on the outside in the large external stretch pocket that many packs come with. This is just one example but what this means for me is that when choosing a backpack there is a specific set of features that I want. The following are common principles that you should follow when packing your backpack:
- Pack the less used, lighter gear on the bottom of the pack
- This includes things like the sleep system (sleeping mat, sleeping mat, and sleeping bag liner). I will usually store my stove system here as well as I only use a stove in camp
- Pack heavy gear close to the centre of your back
- This includes the water bladder and the bulk of your food
- Pack the frequently used gear on top
- Clothing, wet weather gear, first aid
Waterproofing
The last thing you want is a wet sleeping bag or a wet change of clothes and given the amount of electronics that I carry due to my blogging/podcasting I tend to go overboard on the water proofing. In talking about waterproofing I’m referring to rainfall or torrential downpours and not full submersion. The two main option for waterproofing your pack are:
- A Pack Liner
- Pack liners are lightweight internal bags that will protect your equipment from the heaviest of rains and to a point pack submersion. One drawback of using a single pack liner is that in packs that have a bottom access point you either need to have a separate liner for your sleep system (or other gear) so that it can be removed separately or else you block off bottom access point. I prefer to use a pack that has a single top access point but that is a purely personal preference.
The pack liner should be larger than the pack size. This has two benefits:
- If need be you can put your pack into the liner and seal it up which is ideal when you are concerned about dropping your pack during water crossings as well as providing protection from dust and dirt.
- To get a proper waterproofing you will need to have enough unused liner to roll down to get a waterproof seal. For my 51lite capacity pack I use a 70litre liner
- A Pack Cover
- Pack Covers are lightweight external covers that minimise water access by covering the outer exposed area of the pack. Due to my electronics I will carry a pack cover as well as a pack liner. Many people just choose to use a pack cover and forgo the pack liner. Like pack liners you need to allow enough space for a fully loaded pack so keep this in mind and allow for who you pack is at its most loaded state. A good example of this is the image directly below that shows you how bulky my pack can be due to the tent.
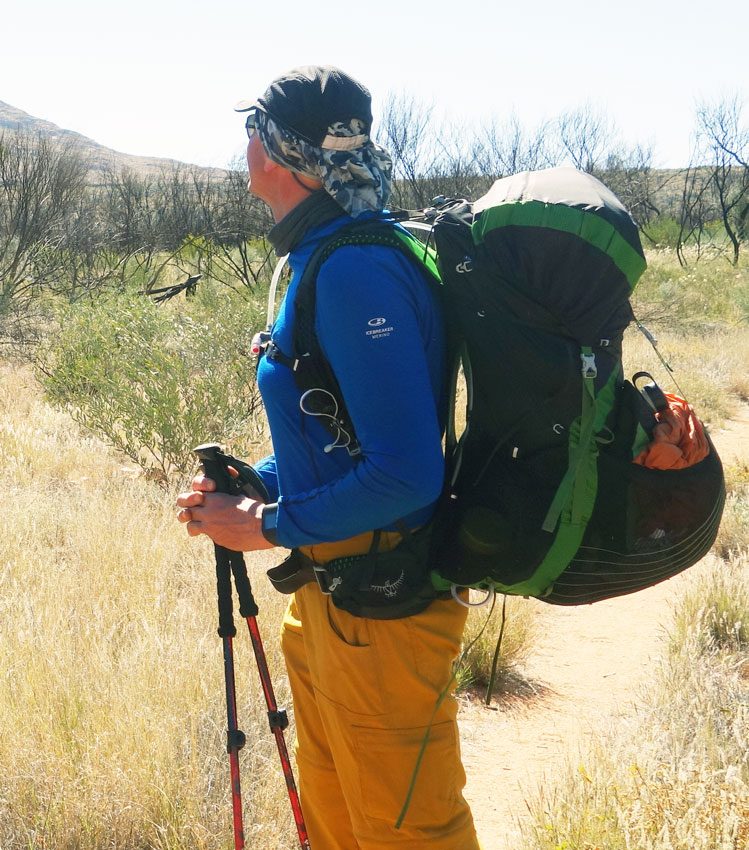
A prefer to stuff my shelter in the stretchy mesh pocket on the back of the pack rather than inside. This makes it quick and easy to access at the end of the day and easy to pack in the mornings particularly if its raining

Pack cover in use on the Overland Track


Dry bag/pack liner in pack ready to fill
Packing Order
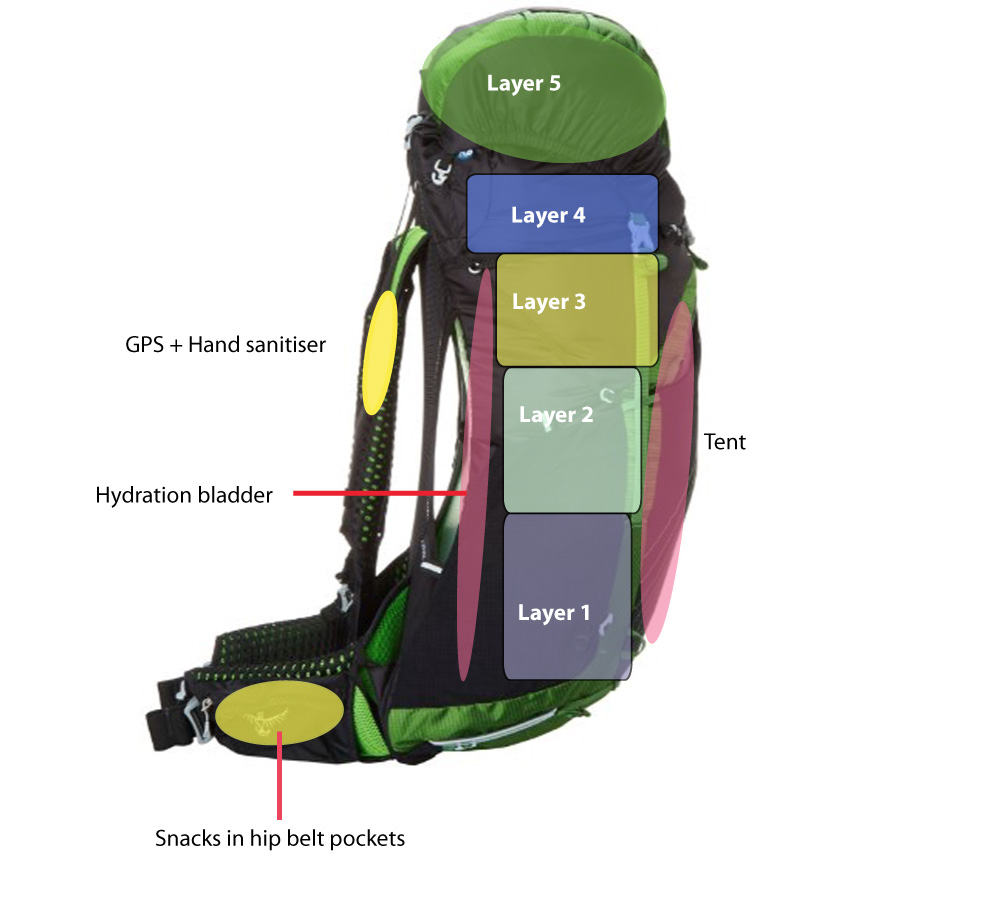
I currently use an Osprey Exos 48 Backpack (Size L), which has a capacity of 51 litres. Having used this pack for just on two years I find that I can comfortably get all my equipment for a 7-10 day, three season (no snow) trip into this pack, including food. My gear goes into my pack in the following order:
Layer 1
Layer 2
- Food (up to 7 days) – with the current days food at the top of this layer
Layer 3
- Clothing
- First aid kit
Layer 4 (outside Pack Liner)
- Wet Weather Gear
Layer 5 Pack Brain
- Podcasting equipment
- Small accessories e.g. compass, multitool, battery pack, charging cables
- Toiletries
- Lunch for the day
- Long Handled Spoon
- Keys-internal brain pocket
- Wallet -internal brain pocket
Large Stretch pocket
- Tent
- Trowel
Side Pockets
- Cup
- Pack Cover
Hip belt pockets
- Snacks for the day
- Bug net for head if needed
- Chap stick
Shoulder strap pockets/shoulder strap
- Hand Sanitiser
- PLB/Satelite communicator
Other
- Camera in pants pocket
- Phone in pants pocket

Rear view of my pack showing the order in which I pack (refer to the list above for detail)

Front view of my pack showing the order in which I pack (refer to the list above for detail)
Side view of my pack showing the order in which I pack (refer to the list above for detail)
Organisation
The trick with being able to find anything in your pack is to develop a system and stick to it. I consistently pack my backpack the same way each time so I know exactly where everything is. I addition I also use colour coded dry bags to keep everything together. In addition these packing cells also provide an additional layer of waterproofing on my gear.

Sea to Summit Ultrasil Dry Sack. These packing cells are very lightweight and will last much longer the large zip lock bags
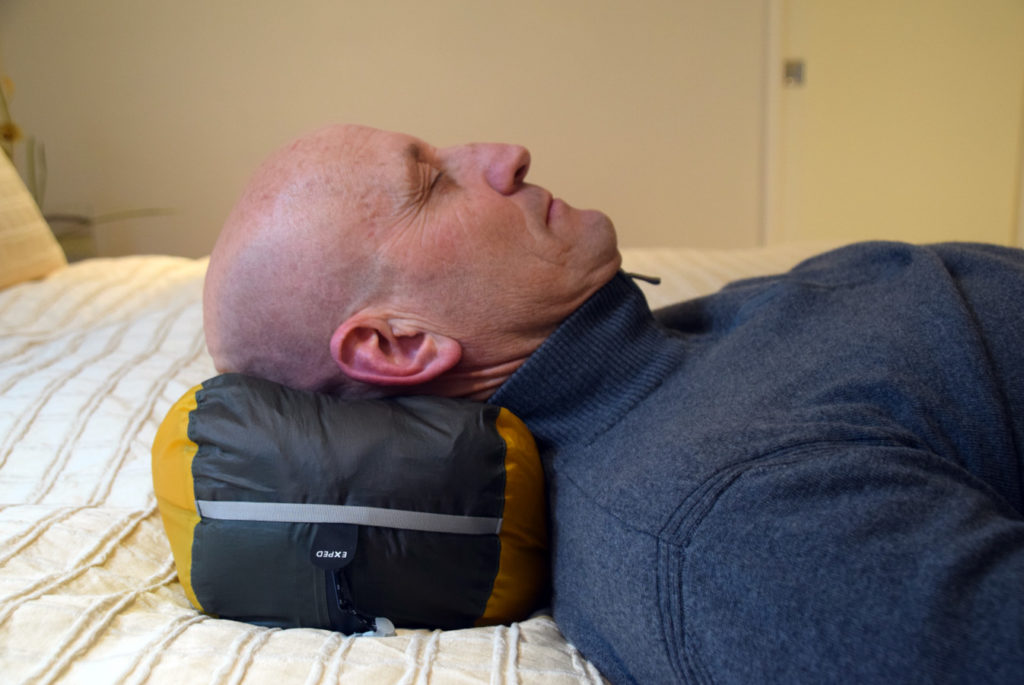
I use my clothing pack as my pillow when sleeping. I will usually slide my buff over this little clothing pack to provide a soft, pillow like covering

Large ziplock bags are excellent for organising food. We number our bags for each day and every day is different. I will reuse this large ziplock bags until they wear out with my oldest ones being around 5 years old
But what about the external attachment points
Most packs these days come with external attachment points and I have seen hikers with everything but the kitchen sink hanging, and clanging from the various clips. Hanging gear from these external attachment points is a personal choice and one that I avoid in almost all cases as I find that things that hang off the pack can get caught up in the vegetation, create noise, or just plain annoy me. The exception to the rule here is that I will attach my hiking poles when they are not being used and my potty trowel. The trowel while attached externally sits within the external stretch pocket with the tent.
Test test test
Do a trial run with your fully loaded pack at home and make sure that it feels comfortable. An uncomfortable pack can mean that you loose focus at the wrong time and that can be dangerous. I would also suggest doing a shakedown hike before a major trip to ensure that the equipment is working and that your packing system is comfortable. Refine and adjust as you need to, particularly when you are changing gear.
Last words
One last comment that I would make is once you have loaded your pack fully tighten all your tensioning straps. The last thing you need is for loose gear to move around your pack throwing off your balance. For this reason it is also important that your pack is not to large. Easier said than done if you only have one pack which returns us to the point of choosing your pack to suit your needs rather than buying a pack and then working out what you are putting in it.
So remember that there is no one correct way to pack your backpack, its really what suits you as an individual based on the basic principles discussed above. However you do need to develop a consistent system that meets your needs that you use over and over again to ensure that you focus on the hike not on an uncomfortable pack.
Click on the link below to view our hiking checklist. Feel free to download it for use on your next trip