Fitting a Backpack
Hiking practice
Developing a good relationship with a local outdoor store can be helpful when starting out as a new hiker. Stores will usually offer good advice on both hiking in your local area as well as providing expertise when choosing the various pieces of equipment you will need. Having said that for many years when I went into a store to buy a new pack, the quality of service and advice I would get varied greatly depending on who was working on the day.
And while I do frequent particular stores and trust in certain knowledgeable staff, I am now at the stage of taking matters into my own hands regarding fitting of new packs and at least now, I know what I need to fit my pack properly. The following steps provide a basic overview of fitting a pack both in store and on the trail.
Choosing Your Correct Size
The most important consideration when selecting a new pack is a correct fit which depends on two aspects. The first is choosing the correct size and the second is making the correct adjustment. The majority of modern packs come with a fair amount of adjustment that allows for fine tuning. So long as you choose the correct size, most packs can usually be made to fit the average person.
So step one, and the most important step, is choosing the correct size pack. Surprisingly this is not based on your height but rather the length of your back, specifically your torso length. Pack manufacturers will usually have a torso range guide to assist size selection.
You will need some help to measure your torso length. Have someone use a flexible tape to measure from your C7 vertebrae (the bony protrusion at the base of your neck) to the top of your hip bones as measured along your spine. This is your torso length. You may find yourself fitting into two sizes based on your torso length and if there is any doubt, trying the pack on will help determine which is the correct size. Many packs now come with an adjustable torso length, which is particularly helpful for growing kids. Follow the instructions specific to adjusting the particular pack to set the correct torso length.
Hip belts on most packs are designed to fit what is considered to be the average body size and shape but some packs will have interchangeable hip belts, which cater for those outside the range. When trying on a new pack, it’s always worthwhile trying it on while wearing the clothing you usually wear when hiking, and at least partially loaded to ensure that the hip belt is adjusted to suit you and optimise comfort.
Now that you have the basic sizing it’s time to fine tune the fitting with the following steps.
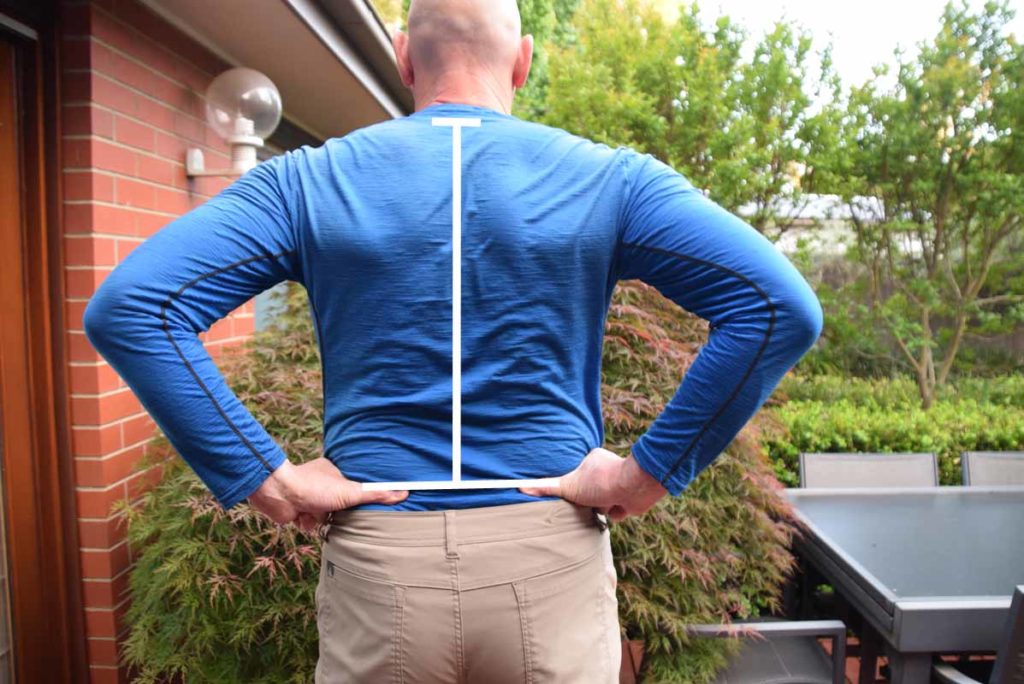
The vertical line shows the measurement of the torso length
Fine Tuning Your Pack
To finalise the adjustment on your pack you’ll need some weight to create a realistic feel. Try to add around 10-15 kg (or your typical pack weight if lower) to simulate a typical trip. This shouldn’t be gym weights as that wont provide a realistic feel. Undertake the final adjustments in the following order:

Put the pack on with the straps adjusted loosely
Adjust the shoulder straps so that the midpoint of the hip belt padding hugs the top of your hip bones (your iliac crest). The hip belt shouldn’t be sitting on top of your hip bones – if it does then you will be putting pressure on your diaphragm which will restrict your breathing and your pack will also be sitting too high. Tighten the hip belt by adjusting the tensioning buckle. The belt should be firm but not uncomfortable
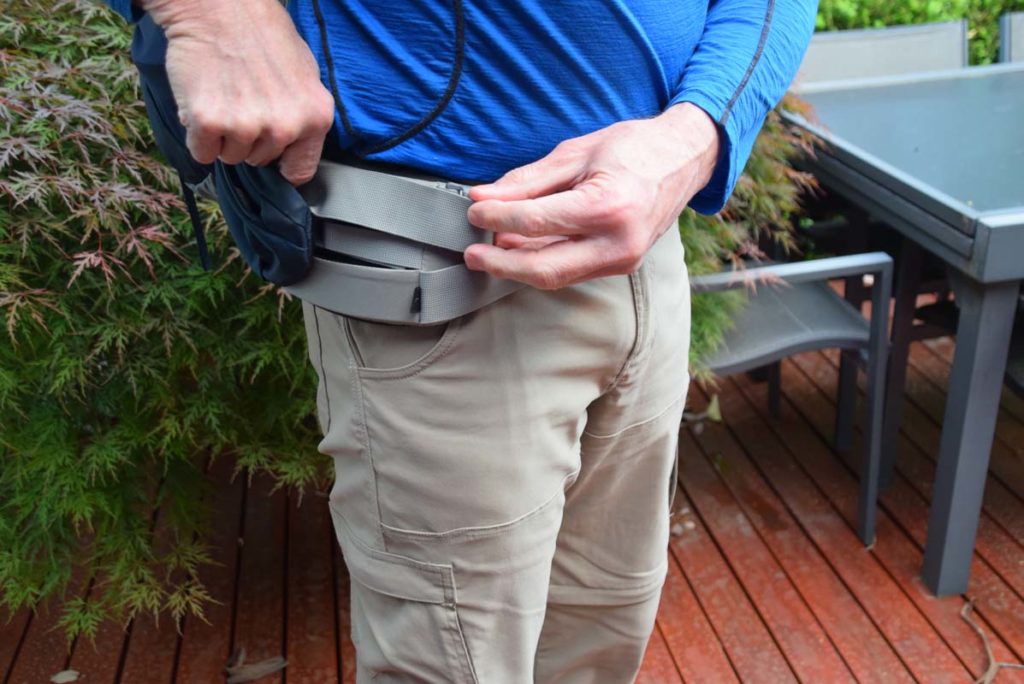
Tuck in the excess hip straps. This step is not essential but reduces anything catching
Next, adjust the shoulder straps until they are firm. This should be done in small increments to ensure you don’t move the hip belt away from its correct position otherwise all the weight will be on your shoulders rather than your hips. The straps should be even on both sides otherwise the pack will be lopsided
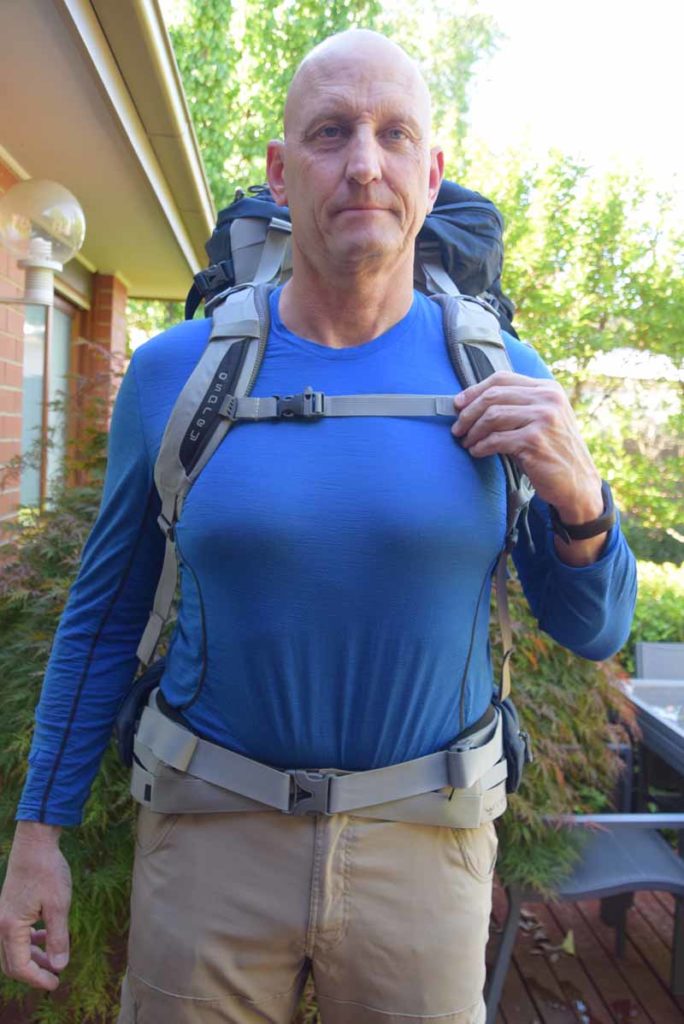
Adjust the sternum strap on the upper chest. The sternum strap can usually be adjusted up or down until it is comfortable. It will usually sit around 25-50 mm below the notch at the bottom of the throat but this will depend on the individual. The sternum strap when adjusted should keep the shoulder straps from slipping but not restrict arm movement or limit breathing
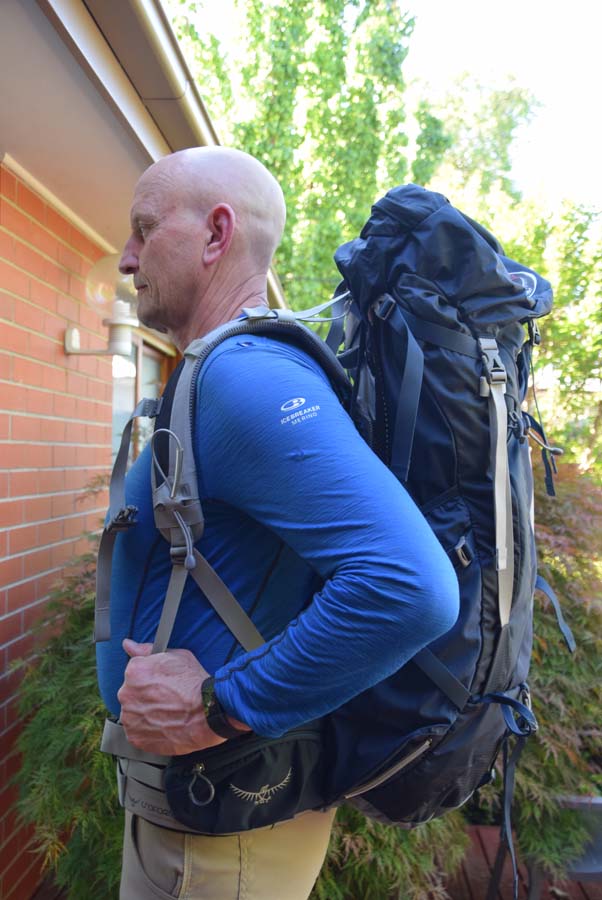
Your final adjustment is to tension the load lifter straps that sit above the shoulder straps. When tensioned correctly, the load lifters should angle back toward the pack body at roughly a 45-degree angle
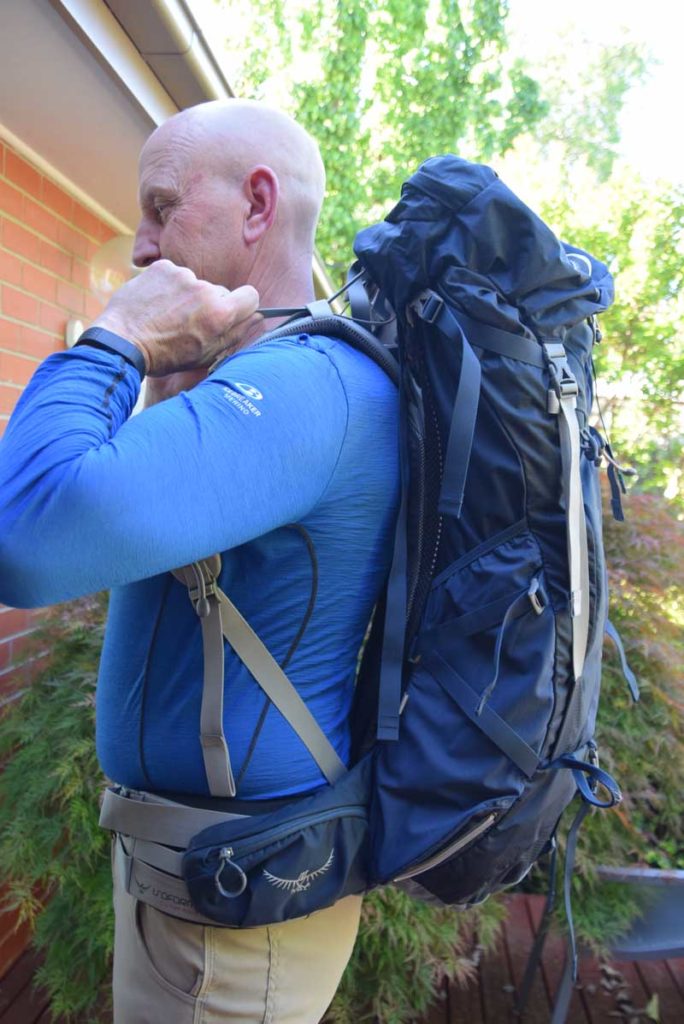
A correctly adjusted pack. A fully loaded pack shouldn’t be above the top of your head. There are two reasons for this:
- Firstly it’s a hangover from the ‘old days’ where the packs were external framed with the frame sticking up on each side. You should be able to walk under branches using the tip of your head as a guide. If your pack sticks up up above your head then you get caught on vegetation more often
- A pack that is sitting high and above your head will throw you off balance which is not what you want
If your pack is above your head then you will either need to look at how its packed or else look at a bigger capacity/volume pack that is wider and deeper to keep your centre of gravity low
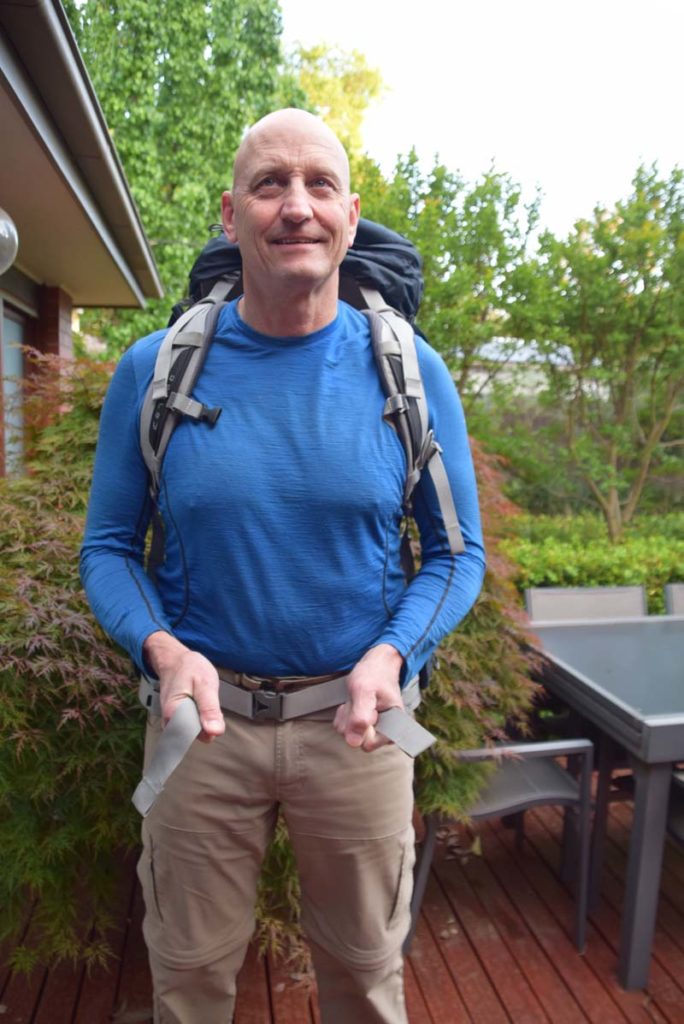
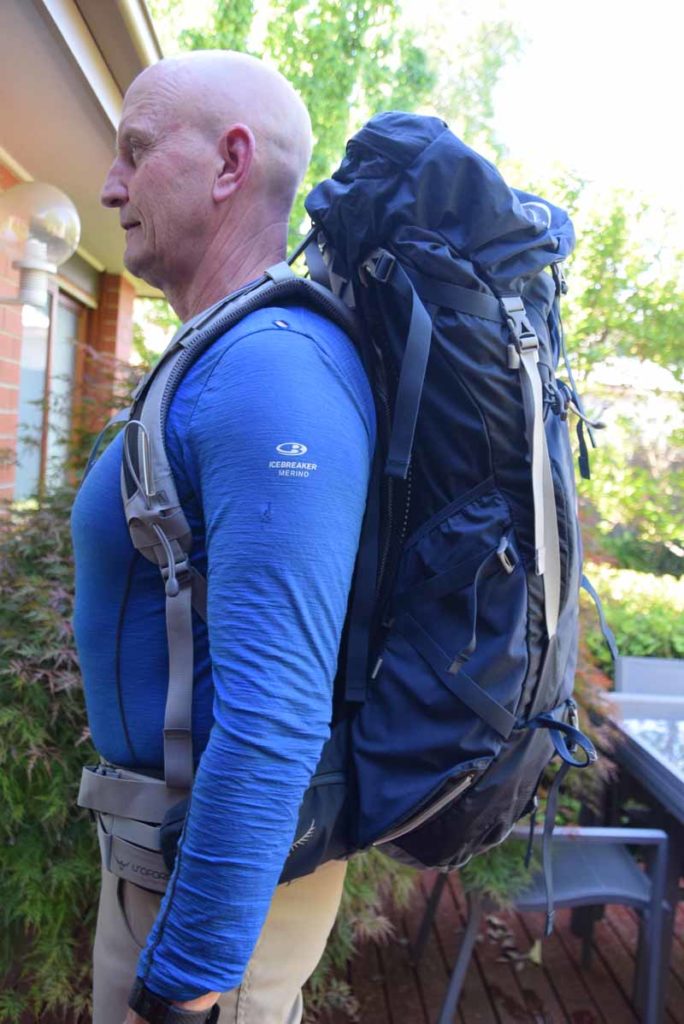
What a pack SHOULDN'T look like
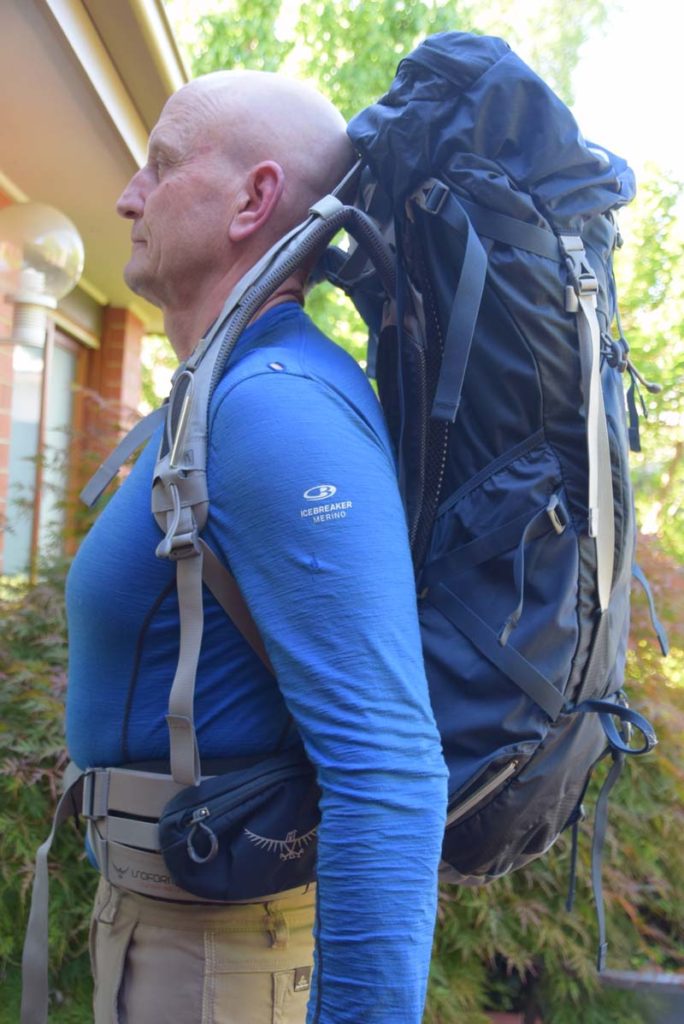
A badly adjusted pack. This is about as bad as you can get. This example has the following issues:
- The hip belt is over tightened and is on the diaphragm and not the hips so it restricts breathing
- The shoulder straps are incorrectly set and are way too high
- The top of the pack is above head high which means that if you are going though an overgrown trail it is likely to get caught on low branches
Last words
Pack adjustment is not a once only activity – it is something that should be monitored regularly through a hike, readjusted as you move, as you add or remove weight from your pack, and each time you put your pack pack on. If you rely on just the initial adjustment then the fit will slowly shift away from what you have originally set