Going to the toilet on the trail
Hiking practice
When you start hiking and camping there is so much to learn. What gear do you buy? How do handle food? Where are the good walks located? And last but not least, how do I go to the toilet? While the mechanics are the same, not having access to modern toilet facilities brings a whole new set of considerations.
For many people when they first start out they will limit the duration of their walks based around the location of toilet facilities but by doing this you can miss out on so many great walks both long and short. Those of us who have been hiking for a while don’t give it a second thought but for those new to hiking, there are some things you need to learn to have a more ‘pleasant’ experience.
In this article we discuss going to toilet on a hike, the process and the do’s and don’ts (pun intended) to hopefully give you a bit of peace of mind if you haven’t needed to consider this basic function before.
The long drop
Before we go ‘au naturel’ let’s look at the typical ‘deluxe’ options we have access to on a hike. In large parks and reserves, in particular on heavily used trails, you will often find flushing toilets on or near the trailheads or at the visitor centres. But once you move a bit further away from the park entry point, you will come across the well known Australian ‘long drop’. While the technology varies these basic style toilets still let you sit down to do your business if you need. They usually don’t have a flush option and all the waste will end up falling into a large pit of some type hence the name ‘long drop’.
Things to consider:
- Close the lid when you’ve finished. If you leave the lid open flies will end up in the waste material which can then proceed to land on you (eww)
- The only waste that should go in this type of toilet (or any toilet for that matter) is human waste and toilet paper. Everything else should be packed out with you
- Be very, very careful with your mobile phone. I have heard many stories about people dropping their phones into bush toilets and then having to retrieve them (double eww).
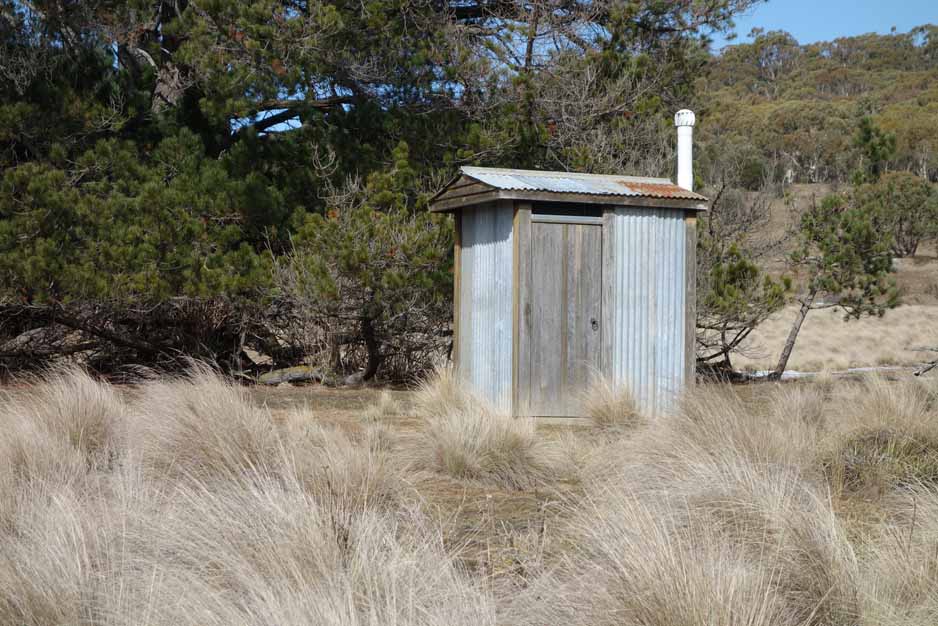
Older style toilet facilities at Westermans Homestead in Namadgi National Park
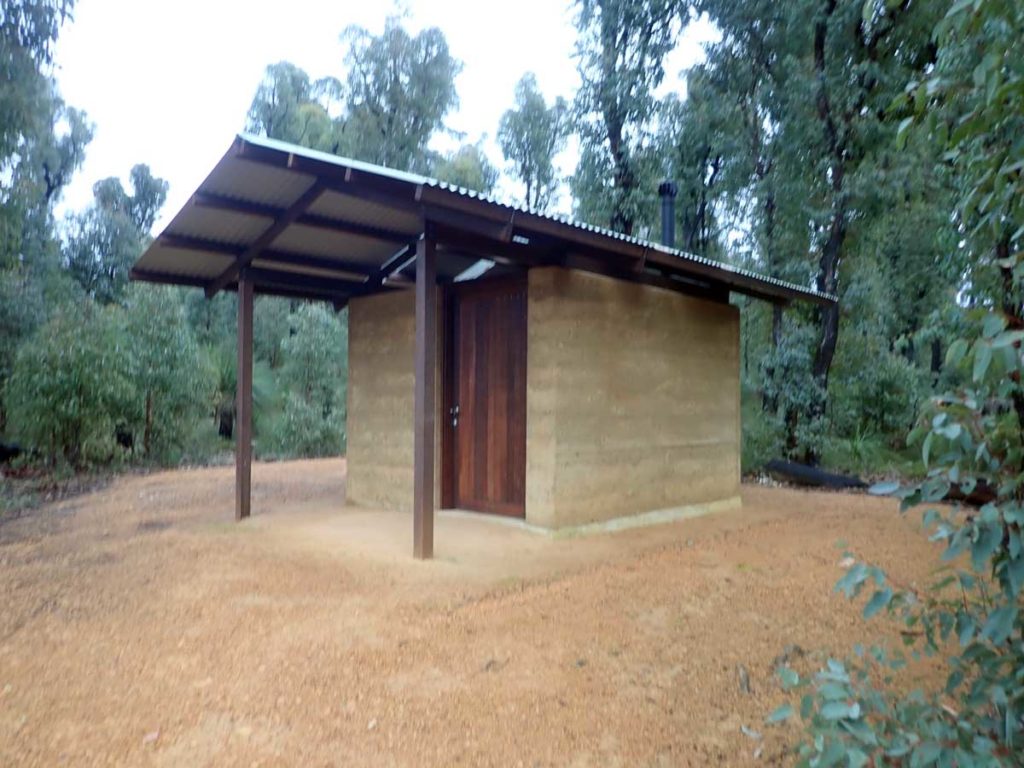
Still a ‘long drop’ but very flash all the same on the Bibbulmun Track
Au Naturel
For most hikers if you are doing a walk longer than a few kilometres or a few hours then it’s reasonable to assume that at some stage you might need to go to the toilet. It doesn’t matter if you’re doing a short hike or overnighting – the principles and process are all the same. Here is what you need to consider:
- Location, location, location. Ideally choose a site that is well away from water. In the Canberra region the recommended distance is 100 metres to minimise any toilet waste ending up in the drinking water, in other states it varies but it is usually a bit less. You should also be well away from your campsite to ensure privacy as well as minimising any odours around your tent. Ideally agree with others in your group to a designated area rather than digging holes all over the landscape
- Go off-trail and be discrete. Murphy’s Law states that ‘anything that can go wrong will’ and in this case you can almost guarantee that even when you haven’t seen another soul for hours, take a toilet break on the edge of a trail and at least one other person will suddenly appear
- If you’re hiking with others, leave your pack on the edge of the trail if you are going a reasonable distance away so that your hiking partner(s) who may be following you know where you are.
Peeing
Usually not something we think about but again if you’ve never had to pee out bush, there are a few considerations:
- If peeing standing up then pee downwind otherwise you will get wet. This is something that males learn very early on but if you are using a female urinary device like the Shewee then you will also learn very quickly about the impacts of wind
- Never pee on/near an electric fence! Mind you the outcome can be quite funny if it’s not you
- If squatting to pee, look at where you are about to squat. Avoid peeing on some poor animal that just happens to be hiding in the undergrowth, snakes included. And watch out for spikey bushes!
- Pee on flat ground or slightly down hill. You want your urine to flow away from you not run into your footwear
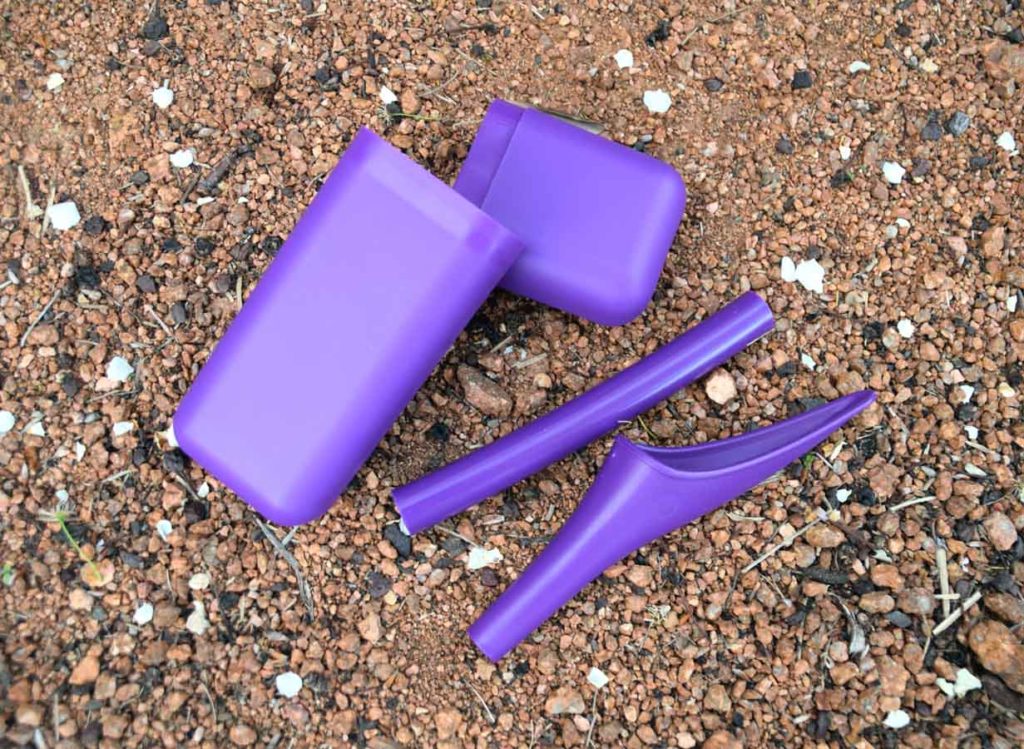
A SheWee and storage case, also know as a ‘Female Uninary Device’ that allows females to pee without having to remove clothing or needing to squat. These aren’t for everyone but are well worth considering
Pooping on the Trail
This is where things start to get a bit more complex. No toilets on the trail and having to squat to do your business. For me this was never a skill I was ever taught and like many hikers you just have to learn what works for you. Here’s what you need to know:
- If you do need to poop then you will need to dig what is called a cathole (imagine a cat in the garden doing its business)
- Catholes ideally should be around 150-200 mm deep by about 200 mm long. The width of the hole is up to you but you will need to be able to ‘aim’ when you do your business as well as stand over the hole comfortably
- Dig your hole well in advance of needing it – on our Larapinta Trail trip it took me anywhere up to 20 minutes to dig holes in the very rocky soil
- When we camp either solo or as a couple, digging the cathole is one of the set up jobs we do along with setting up the tent. The last thing you need is to go in a hurry and there is nowhere to bury your waste
- We will usually go large in size so that we can both use the same hole and add some soil between use and the still have plenty of depth to properly bury in the morning before we break camp
- Carefully place the soil in a pile just off one edge and away from were you stand
- Ensure that your hands are clean
- To poop in the wild you will need to squat in a stable position, aim as best you can to do your business (this is definitely something that you learn)
- Cover the waste with soil but don’t bury anything else except toilet paper or human waste. Carry everything else out with you. The trowel should only touch soil
- Clean yourself properly but remember that there isn’t a never-ending supply of toilet paper unless you are only out for a short hike
- Backfill the hole and ensure that when you walk away the soil is well compacted and any waste is well covered
- Clean your hands thoroughly
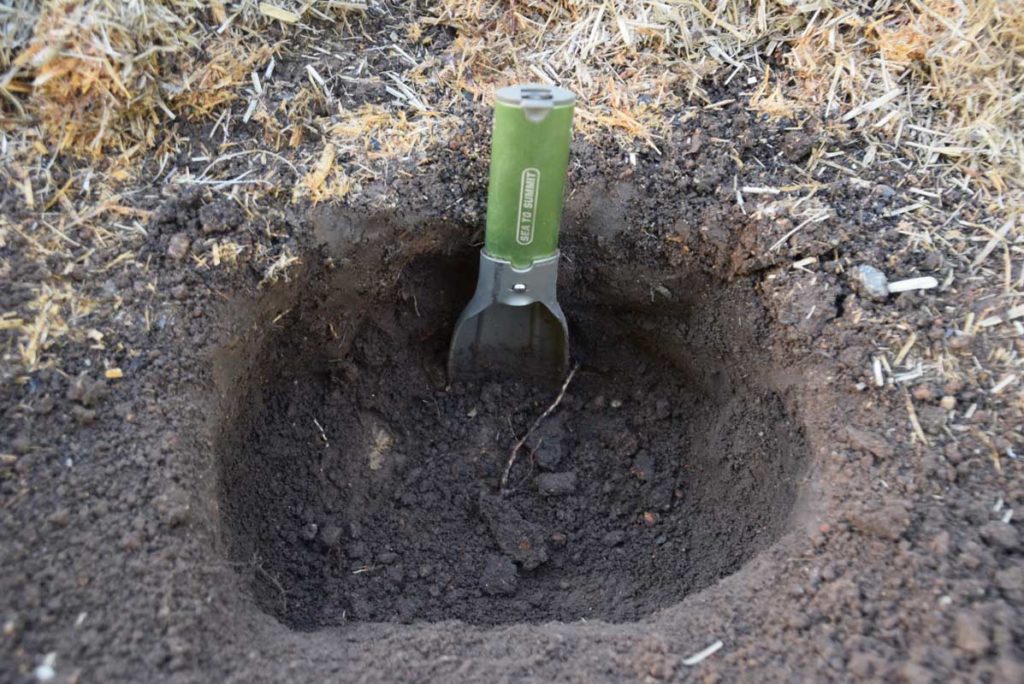
A cathole ready for use
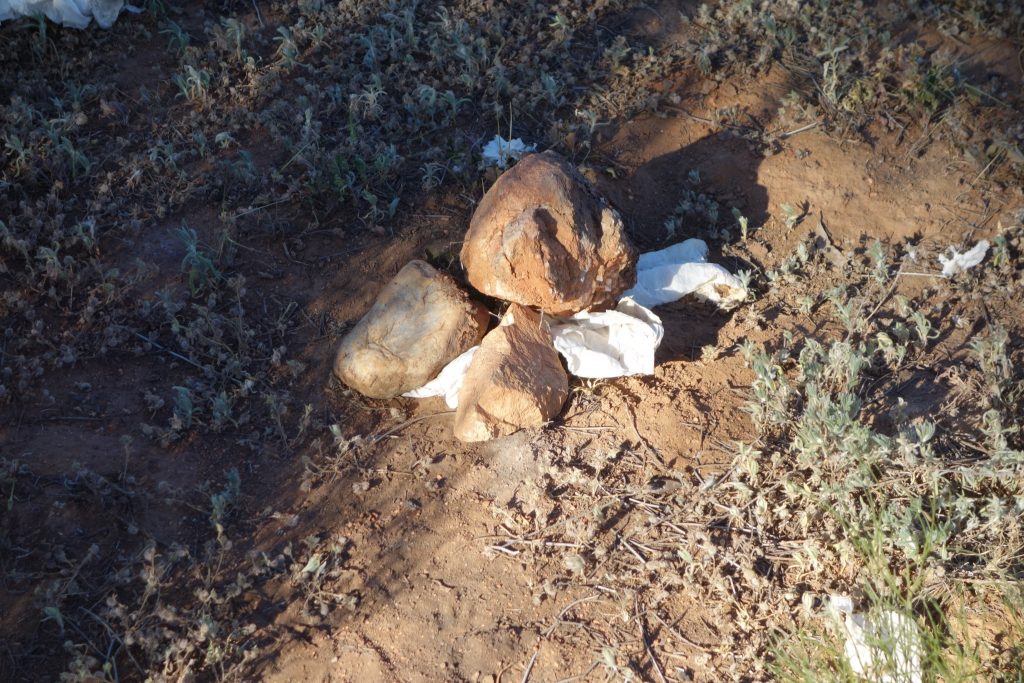
What NOT to do – exposed human waste on the Larapinta Trail. This was just one of many and right next to the camp ground. It took me about 20 minutes to dig a suitable depth cathole
Toilet kit
At the very least you will need something to dig a hole with and there are a number of very lightweight hiking trowels that do a very good job. And don’t forget the toilet paper and hand sanitiser.
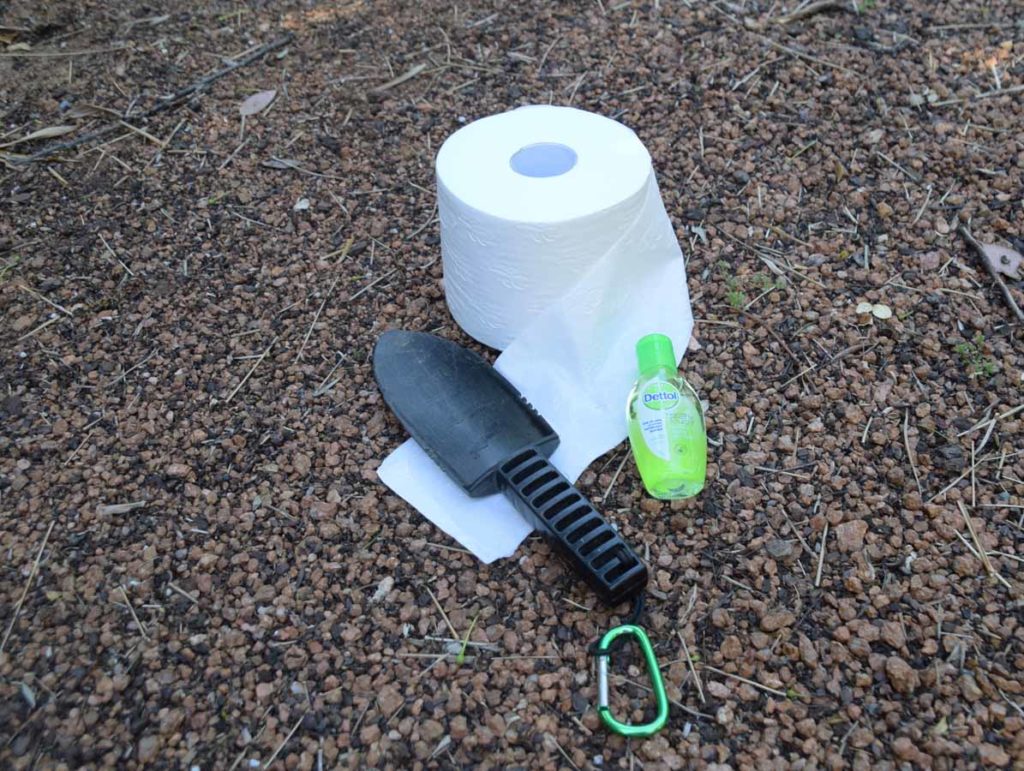
- GSI Cathole Trowel with carabiner that clips on to the pack. This isn’t the lightest trowel on the market but it will dig through just about anything
- Toilet paper in a well sealed zip lock bag. I measure out nine sheets per day and find this averages out well over an extended trip. Work out how much toilet paper you need
- Hygiene on the trail is crucial to a happy healthy hike so use hand sanitiser (or wipes) when you don’t have access to soap and water. Never wash your hands in a creek or small water body as this is what we drink from.

Hand sanitiser
Other things to know
These are things that you tend to learn as you go:
- Always carry toilet paper on a hike. You never know when you might need it and sometimes while there may be a toilet, the paper has either run out or is sopping wet because of heavy rain and is unusable
- Store your toilet paper in a resealable bag
- Carry your toilet paper in daily allotments. Only you will know how much you need and I would suggest carrying extra. This is something you will need to learn and is specific to you
- I hate having to get out of the tent at night time particularly if it’s pouring with rain. While it’s not something I do all the time, peeing into a large ziplock bag is a good option. This is not just a male option and females can also use this practice however you just need to be a bit more careful. You can also use a disposable plastic bottle
- Store this container/bag outside of the tent in case of leakage
- ‘Pee rags’ are an option for women instead of toilet paper for cleaning up at the end of the process. Just remember to rinse regularly and dry out, usually on the outside of the pack
- Kangaroos and other wildlife often like to lick/eat grass that humans have just peed on as they like the minerals that we excrete so don’t be surprised when they do this.
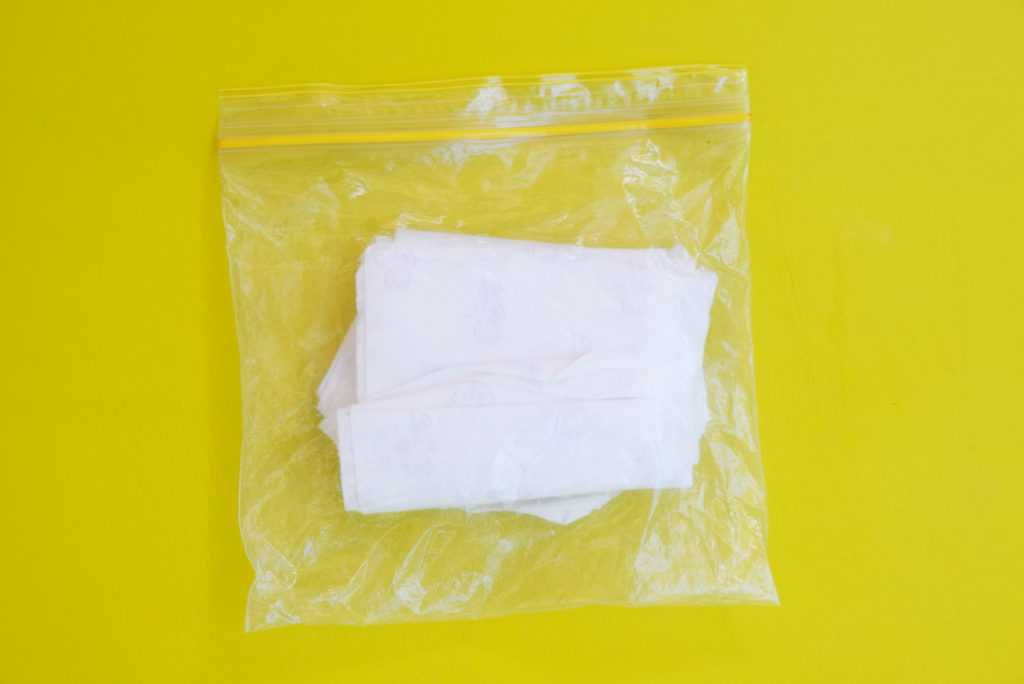
Toilet paper folded in daily allotment (nine sheets per day for me) and stored in a small well sealed ziplock bag
Hiking and periods
This is not quite in the category of going to the toilet but hiking and periods is worth mentioning. As a general rule there is no need to do anything different when hiking as you would do in your usual routine. There are however a few things to consider:
- Sanitary items don’t break down readily so always pack out used pads and tampons. Wrap in a small amount of toilet paper and place them into a resealable bag
- Never dispose of used sanitary items in the toilet – irrespective of where the toilet is or the type of toilet. Ever!
- You will find some suggestions that you should burn used sanitary items on the trail. This assumes you’re able to light a fire (many areas we hike restrict the lighting of fires) and you’re hiking alone – burning used sanitary items is probably not something you want to do when hiking with a group. And even if you do burn the used items, you will need to carry out the refuse. The best option is not to burn them and instead place them in a resealable bag and always pack your waste out
- You can use a menstrual cup which is a small silicone funnel that sits inside the vagina and collects the flow. These cups can be washed and reused. I’ve heard of them lasting years so they are a very environmentally friendly, sustainable option. There is no need to remove the cup before peeing which makes this a very easy, efficient and clean option
- Whatever you use, it is especially important when you are hiking to wash/clean your hands both before and after you go to the toilet. This is because you are touching all sorts of things when you’re hiking and you can unintentionally introduce bugs if you don’t clean your hands before touching your private bits – this should be a rule for everyone irrespective of gender or age.
The way of the future?
One option that is starting to be discussed in Australia is rather than leaving your waste in the wild you instead bring it out with you. This alternative is something that has gained traction in the USA in particular but also in alpine regions of New Zealand.
Options include:
- Poo tubes
- Poo pots
- Wag bags
Essentially with this option you poop in a plastic bag. In the case of the Poo tubes and Poo tubs you knot up the bag (preferably biodegradable) and then place it in the tube or pot to be disposed of. In the case of the Wag bags which have a use in mountaineering and rock climbing, you are pooping directly into a bag system that is designed not to break and keep in any odours. The bag is then disposed of when you return from your hike. Ideally you want to use a 100% biodegradable bag.
This method is definitely the best option for protection of the environment and is essentially the human form of the bagging you do for your pets. Having said that I have seen so many people who collect their dog’s waste in a bag and then leave on the side of a footpath or trail.
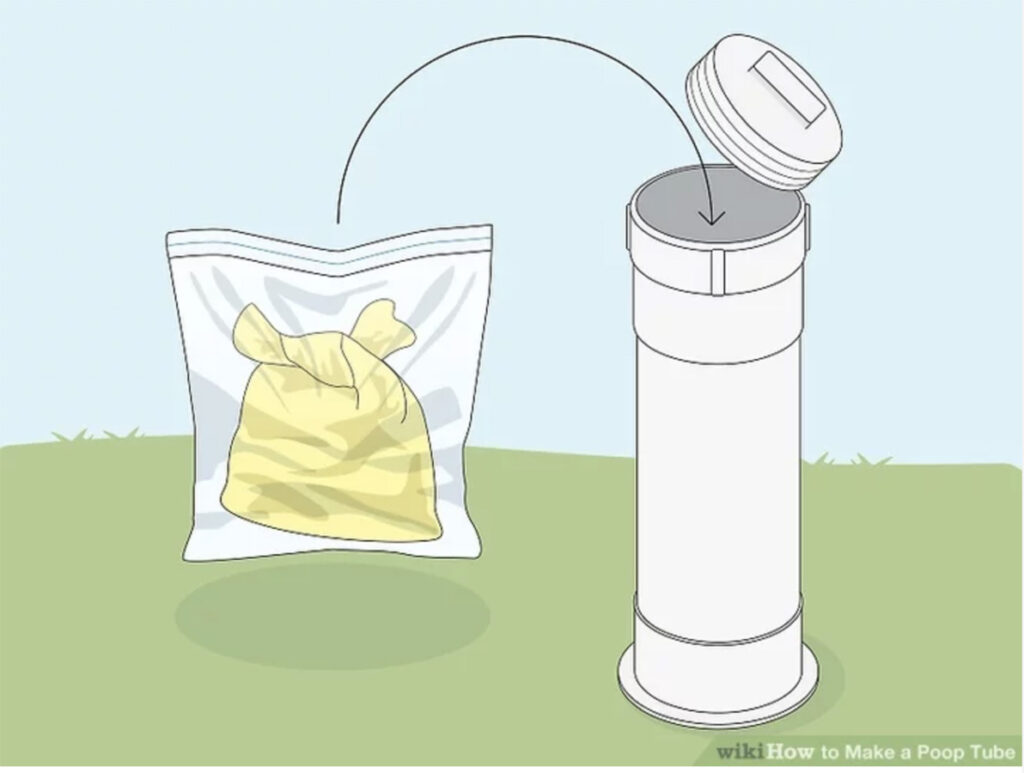
Image from https://www.wikihow.com/Make-a-Poop-Tube
Final thoughts
All our lives we have been going to the toilet and kids often find this bodily function hilarious. However for many hikers the first time they ever have to go to the toilet in the bush may well be as an adult. Like any skill there is a learning curve so if you’re planning on going on an extended hike where you know you will have no facilities to use then its worth practicing these skills to minimise the anxiety of having that ‘one less thing’ to learn.
Whatever method you use, pick something that works for you but make sure you think about the impacts of your actions. If that involves burying your waste, make sure you do it properly. If you carrying your waste out then use bags that are biodegradable and again dispose of them properly when you do return home.
So now you know your options there shouldn’t be anything stopping you extending the length of your hiking experiences!