Navigation on the trail: an introduction to maps and compasses
Hiking practice
The level of navigation skills that you will need as a hiker will vary with the complexity of the walks that you do. If you never leave well marked trails the skill requirement you need, may, but not necessarily, be minimal. The advent of mobile phone apps, as well as the availability of high quality consumer level GPS including some watches has changed hiking forever. Gone are the days when you had no choice but to use a map and compass however having a good grounding in their use should be something we all aspire to.
This article provides a basic introduction to map and compass use that will hopefully add to your skill level as a hiker and inspire you to learn more. Our next article on intermediate map and compass use will take this a step further.
The very basics
Before you even pick up a map and compass there are a few hiking practices that you should be considering on every hike regardless of the complexity. These are:
- Plan your Hike
- Find out as much information as you can about the hike to determine how difficult it will be and what levels of experience and equipment that you will need.
- Hike within your limits
- Ensure you have the appropriate navigation skills needed for the trip you are planning. If not your own skills then ensure that someone in the group has the ability to navigate the proposed route. If you or someone in the group doesn’t have the appropriate skills, then reconsider the trip.
- Pay attention
- For me this is a biggie. You may not be the most experienced hiker in the group and you may have zero ability with a compass or map but paying attention almost seems to be a forgotten skill amongst many hikers. It may be that the person navigating is the one that has an accident or needs help so you should have a basic idea of which direction you are heading, where the key landmarks are, and (in case of an emergency) how to get back to the trail head or to some other relevant location such as a main road or town. If the situation is serious know where the Personal Locator Beacon is and know how you use it.
- Don’t work on the basis that someone else is doing the navigating and you don’t need to contribute. I learnt a long time ago (the hard way) when I was just learning navigation skills that you should know where you are even if you’re not the one leading the activity.
- How fast do you travel?
- At some stage you will need to work out how fast you walk over a variety of terrain. Knowing this will help you work out how fast you can travel and how far you can walk on a particular day/time period. I consider myself to be a very fit, very active hiker, and based on my experience from my own hikes I use the following average paces with a multi day pack of around 14kg.
- Formed flat trail: 4-5km/hr
- Steep inclines on a formed trail: 3.2-3.5km/hour
- Average over a typical day: 3.75km/hour
- At some stage you will need to work out how fast you walk over a variety of terrain. Knowing this will help you work out how fast you can travel and how far you can walk on a particular day/time period. I consider myself to be a very fit, very active hiker, and based on my experience from my own hikes I use the following average paces with a multi day pack of around 14kg.
What navigation equipment should you carry when hiking?
When I hike I make an assessment based on the level of risk associated with each specific hike and this is something that every hiker should consider.
- Urban hikes
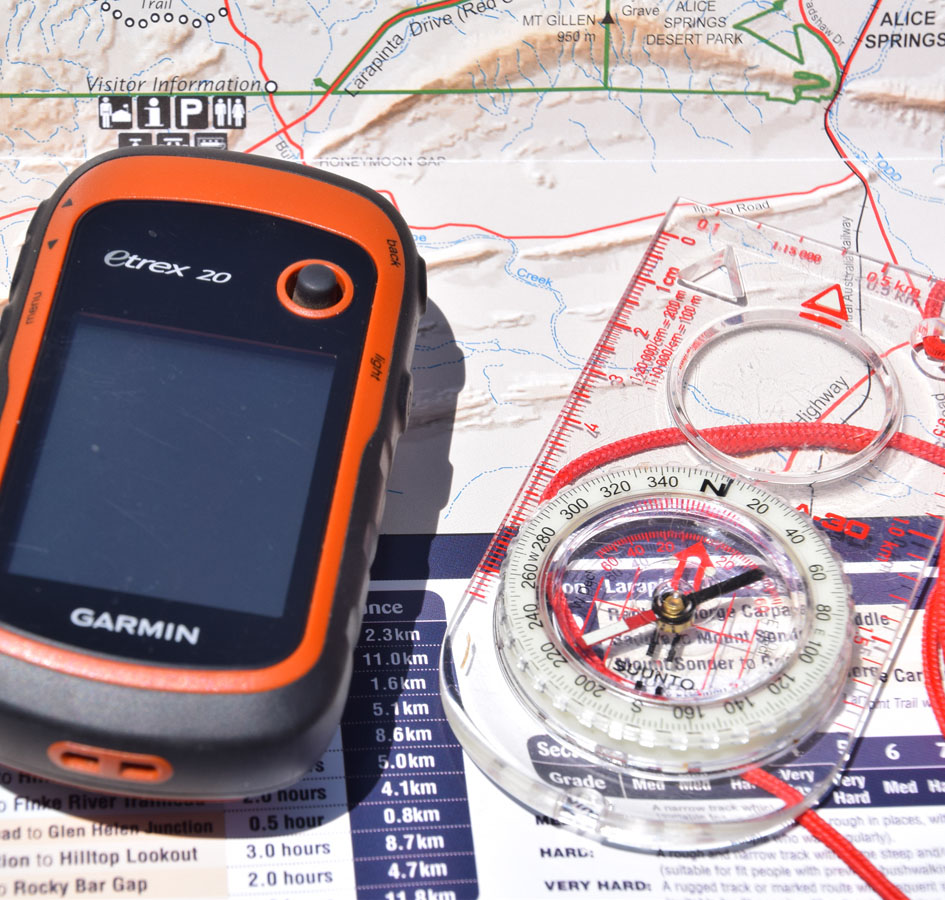
- If I hike in urban areas I will carry my mobile phone with me just in case and if I’m reviewing a particular hike, a GPS to log the details. This may sound a bit odd but when I urban hike in Canberra this often involves bush land and along with it the possibility of poisonous snakes.
- If I have no mobile phone signal
- Regardless of the location if I don’t have a mobile phone signal I will carry a compass, GPS, and Personal Locator Beacon. I may also carry a map if the trail is not well marked.
- I’m going bush
- By this I mean that I’m away for a long period or walking through the bush off any defined pathways and usually without any mobile phone signal. In this instance I will carry a compass, GPS, Personal Locator Beacon, and map. This may stretch to a satellite phone or messaging system such as a Spot or a Garmin InReach where the ability to reach your loved ones for the occasional check in is desirable.
Why carry a compass?
So lets discuss compasses; why on earth would you want to carry one, I mean aren’t they obsolete? Short answer to this question is yes but the long answer is no. GPS units use batteries and while they are very rugged and extremely reliable these days they can potentially fail. The signal can also drop out in rugged terrain/poor weather.
But why would you carry a compass on trails that are obvious? The simplest and most obvious answer is so that you head in the right general direction when the trails aren’t marked. Having a compass, as a minimum is essential when you are away from easily traversed trails and helps if you get turned around without realising.
Compass anatomy
The first thing you need to know about compasses is that there is a front and back. The easy way to remember which is the back end of a compass is that this is the end with the cord attached.
The next thing you need to know is that most compasses only work in either the southern or northern hemisphere although there ar some compass that will work worldwide but they amenity the cheaper models. This is just one of the reasons that compass prices vary so much. If you plan on doing lots of overseas hiking it may be worthwhile buying a better quality compass that works worldwide and as a result will cost more.
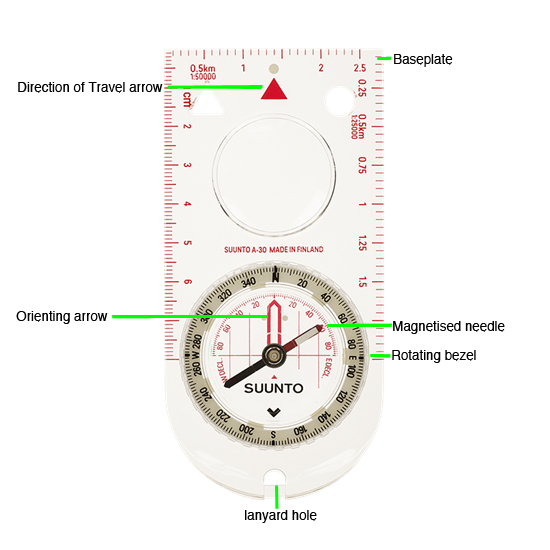
The most common form of hiking compass that you will come across these days has the following parts:
- A base plate
- A moveable bezel.
- A north needle (usually red in colour)
- A direction of travel arrow
- The front of the compass is the end without the cord attached. This end also has a direction of travel arrow on the base plate.
There are other features on most compasses and we will discuss these in our next article on intermediate navigation.
Basic Compass use
An example of compass use at its most basic was my 2016 Larapinta Trail Trip. We were essentially travelling from West to East along the West Macdonald Ranges. The trail was very clearly defined so navigation wasn’t an issue and so long as you stuck to the trail is was impossible to get lost, almost. One scenario that I planned for was the possibility that due to family reasons, that I may have had to leave the trail away from a trail head so would need to be able to navigate cross country to Namatjira Drive which is the major road that pretty much parallels the trail to the south. So long as I paid attention to where I was going heading south on the compass would have put me in touch with the highway in a reasonably short period of time.
The simplest way to find north (specifically magnetic North) which is what compasses are designed to do (we have true north, magnetic north and grid north and will discuss the differences in our post on intermediate navigation) is to make sure the north needle on you compass is pointing to the same way as the direction arrow and you will be heading (see image below). This also means that the moveable compass bezel will have ‘N’ (0 degrees or 360 degrees) showing at the top of the compass (in line with the direction arrow on the base compass base plate).
To travel south we would need to rotate the compass bezel so that ‘S’ (180 degrees is in line with the direction of travel arrow (see image below). This will mean that when we align the North arrow to the marker on the base plate, that the North arrow will be pointing to the N on the Bezel we are now heading south. The same applies for east and west.
Another use for a compass is when you don’t necessarily need to know the actual direction but are heading towards a particular feature that is visible from your start point but may not be visible throughout the hike because of dense vegetation or terrain. Taking a bearing to where you are heading to and follow your compass. To return to the starting location rotates the compass bezel 180 degree to return to the start. This is called a back bearing.
These forms of navigation are probably the most common use for a compass that I see on the trail. While I do see individuals undertaking more complex compass use its not as common.
Choosing a compass
The two most common brands of compasses on the Australian market today are Suunto and Silva. I own one of each of these brands for different reasons. If you only carry a compass for direction finding and taking simple bearings look at either the Suunto A-30 compass priced at under AUD$60.00.

What is a Topographic map?
Maps are a two dimensional representation of the terrain that allows you to see what the area you plan on travelling over looks like before you get there. Maps will show you how steep the terrain is, where the water courses are and identify any major trails or features that you may come across.
Normally when you talk about navigation you tend to think of maps and compasses together. While carrying both will provide greater versatility as well as providing greater accuracy on longer hikes maps and compasses can be used independently of each other.
Basic Map Use
My main use for a map is to determine what features and points of interest are there and allows me to take what I am seeing on the ground and help determine where I am. As an example if I am heading up a mountain and know from the map that I will reach a saddle or a mountain peak at a particular point I can determine if I am on track. Maps will also show how steep the terrain is and when you are travelling in areas that have steep cliffs you want to know where they are.
The best way to get familiar with a map is to start using one for an area that you are very familiar with. Go for a walk and use the map to start identifying features on a well known trail where you don’t need to focus on navigation. This will allow you to focus on the map itself rather than having to navigate.
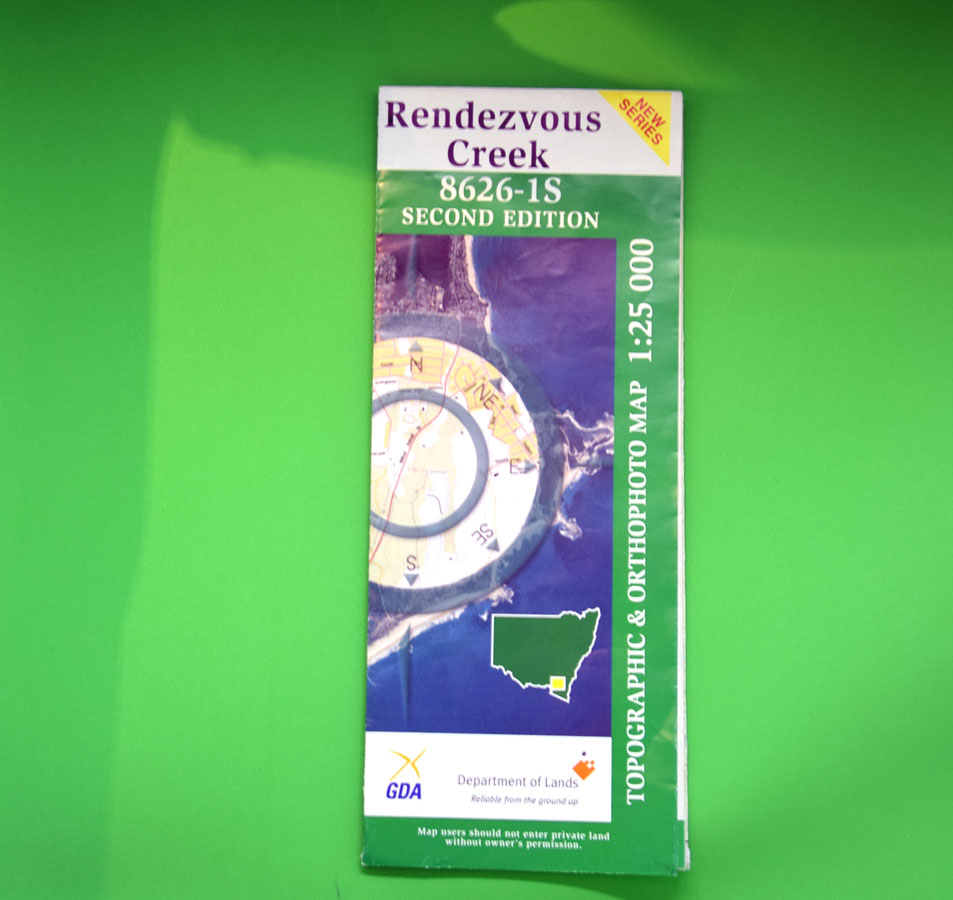
1:25,000 scale topographic map. Choose this size map if available as it will provide a good scale that is easy to interpret
The final word
Practice, practice, practice. This is where you improve your ability. Even when doing a hike you have done a hundred times before try to recognise where you are and where you are heading in relation to the terrain. Bring out the compass and/or the map and see if you can work out the direction in which you are heading. If someone else is leading the trip and doing all the navigating, ask questions and ask if you can help. Navigating on a trail is really the best way to improve your skills.
Resources- maps sales
Australian topographic maps at a scale of 1:25,000 can be sourced at the following locations. Some of the 1:25000 seal maps are being run down and replaced with 1:50,000 scale maps
Melbourne Map Centre 1:50,000 (SA)