Layering for Comfort
Hiking practice
As we gain experience as hikers we start to improve our understanding of our equipment; how it works, or how it doesn’t, and this includes our hiking clothing. Over a series of hikes you’ll learn to read your body’s requirements and appreciate which pieces of clothing go together to form a ‘layering system’ to keep you comfortable no matter what the conditions. This article starts by looking at what a layering system is, discusses the common layers, and looks at what goes into making up a layering system using examples from our own experience based on three season hiking.
In any discussion on layering there are lots of preferences and be warned everyone’s tolerances to heat and cold are unique so please use this article as a guide only. I have spent the majority of my working life outdoors and have a very high tolerance to cold so my preferences will be unique to me.
What is layering for hiking?
It’s as simple as it sounds. Think of an onion that is made up of a series of layers. Most of us will already layer our clothing in our day to day lives without too much thought. Wearing our underwear, followed by pants and a top, and as it gets colder a jumper, jacket and so on. If it starts to get hot we take off some layers, if it gets colder we add layers or use thicker layers until we are comfortable. We’ve all been cold at some point because we misjudged the weather or were wearing the wrong clothing. In normal day to day life if you misjudge the worst that usually tends to happen is that we end up being miserable and cease whatever activity or outing we were doing learning from the experience.
When we hike the consequences will vary from just being uncomfortable to developing more serious issues such as hypothermia through loosing excessive body heat, or heat stroke/exhaustion though overheating. Having a layering system that you understand and knowing the limits of each piece will ensure you only carry what you need as well as having what you need to keep you confortable and safe.
Temperatures aren’t temperatures
Have you ever gone outside in 10° Celsius and been warm based on what you have on but the next day in exactly the same temperature and clothing you are cold? This is due to how we perceive the temperature based on the combined effects of air temperature, relative humidity and wind speed; this is known as ‘apparent temperature’. When we are looking at a layering system this is what we should be considering. Examples of this are when you hike through a protected valley or forest you often feel warmer than you expected but when you cross an open windblown plain you often feel cold. What this means in practical terms is that you should be prepared for the extremes based on the apparent temperature and layer accordingly.
Another factor to consider here is that when you are on the move, you feel warmer as opposed to just standing around. So what you wear when hiking as opposed to sitting around camp at the end of the day will vary.
Apparent temperature is what really matters when undertaking an outdoor activity
Overview of layers for hiking
In an online survey we conducted regarding three season hiking (non snow conditions), 52% of respondents used a layering system consisting of four layers and a further 41% of respondents used a layering system consisting of three layers. Anecdotally this is what I expected from the survey by what I have seen on the trail. From a personal perspective, I use a layering system that consists of four layers that will keep me comfortable down to -7° Celsius or colder (20° Fahrenheit.) I remove or add layers depending on the conditions and only wear all four layers when temperatures are either really cold or the apparent temperature due to wind and moisture feels that way. If the conditions dictate you may be wearing all your layers so ensure that they are comfortable as a system not just as individual layers.
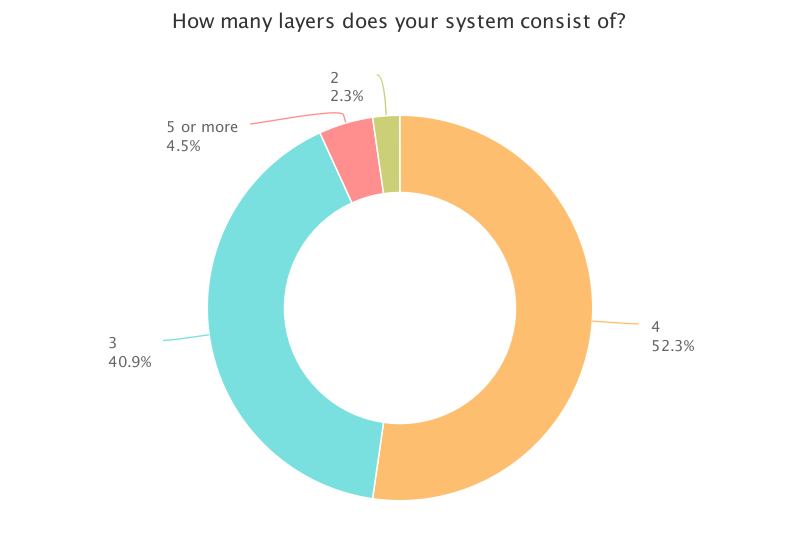
Number of layers used in on online survey conducted on our Facebook page

My current four layer system showing the following:
- Long sleeved lightweight top
- Long sleeved heavy weight top
- Lightweight down/synthetic jacket
- Lightweight rain jacket
Material choice for layering
These days the average hiker is swamped with choice but put simply your fabric choice comes down to natural or synthetic garments. Natural garments tend to be Merino wool based but can also be silk or even bamboo although these materials are not as commonly used. Merino wool used in today’s garments doesn’t tend to have that itchy feeling like the woollen sweater that grandma knitted for you. Common brands available on the Australian market include Wilderness Wear, Ottie Merino, Icebreaker and Smartwool.
Wool based garments have the advantage of being a natural resource, are reasonably impervious to body odour so you can wear it day after day and not stink (as badly at least). They are relatively soft and comfortable against the skin, can also absorb a fair amount of moisture, drawing perspiration away from your skin, and still insulate you at the same time. Wool also insulates you from the effects of heat.
Avoid cotton hiking garments such as t-shirts and jeans as they retain moisture, which may be OK when it’s hot, but dangerous when it’s very cold.
Synthetic garments made out of manufactured materials are also common on the trail. Today’s synthetic garments for hiking tend to be very different from your usual work wear and have a high amount of technology integrated into the manufacturing process. Synthetics dry much faster than wool, are usually not as expensive and tend not to shrink when you put them in a tumble drier. They do however tend to smell after a few days. Well known brands include Helly Hansen and 360 Degrees.
I’ve used both synthetic as well as wool based garments and I prefer the wool purely because it doesn’t stink as much, after weeks on the trail.
The Layers
The following four (4) layers will suit most people who are three season hiking. By wearing multiple layers (as opposed to a single bulky layer) you have more versatility and are able to adapt to your surrounding conditions.
I must say up front that while I used to wear short sleeves as well as shorts when hiking, this is no longer the case. I now almost exclusively wear a long sleeved top when hiking and almost exclusively wear long pants. Long clothing also reduces the likelihood of skin cancer through sun exposure (a major issue in Australia), and reduces fluid loss and the drain on your energy that occurs when you have large amounts of bare skin exposed to the sun. Long clothing also minimises issues with Ticks and other biting insects such as Mosquitos or March Flies.
Base Layer
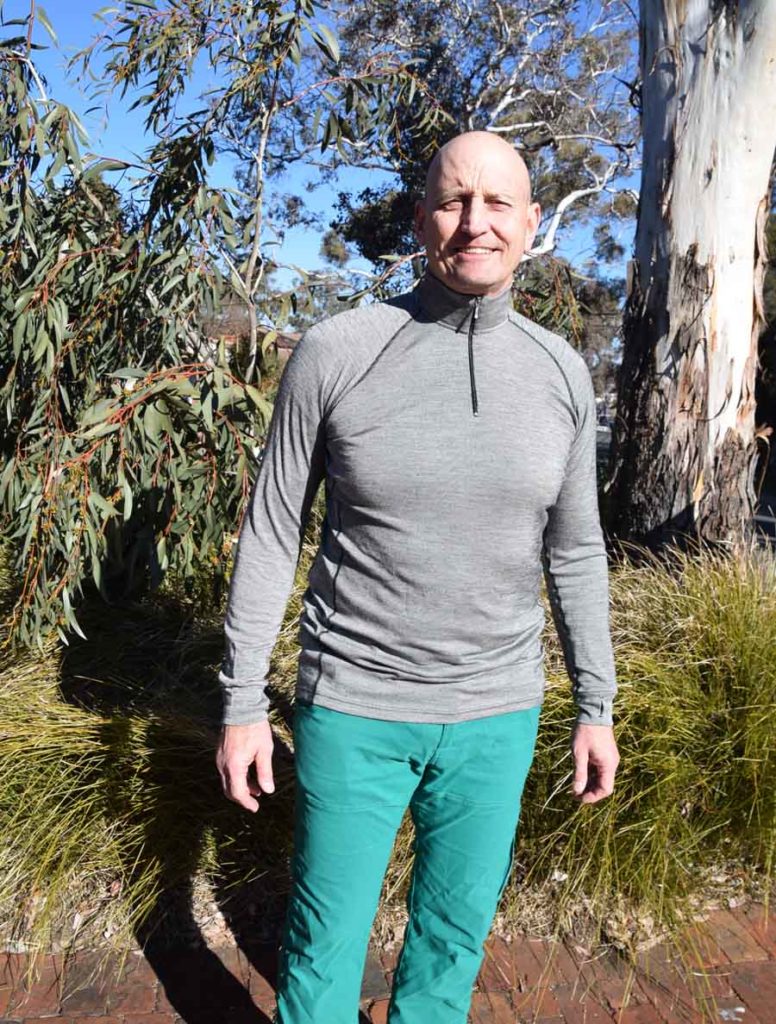
This is the layer that goes against your skin. The job of the base layer is to wick moisture away from your body (moisture is a great conductor of heat). By removing moisture, you will stay warmer. I typically choose a single garment for the entire year, the Wilderness Wear Mens Cool Merino 155 Long Sleeve Zip Neck Top (fleece weight of 155). This woollen garment will keep me warm down to an apparent temperate of around 4° Celsius when I’m hiking but is a bit cool if I’m just standing around. Depending on your normal temperature tolerances this garment is also comfortable in temperatures over 30° Celsius. If the weather is going be consistently on the cold side then I will replace this base layer with a warmer one; but that rare.
Wilderness WearMen’s Cool Merino 155 Long Sleeve Zip Neck Top provides sun protection as well as a layer for wicking moisture
Mid Layers
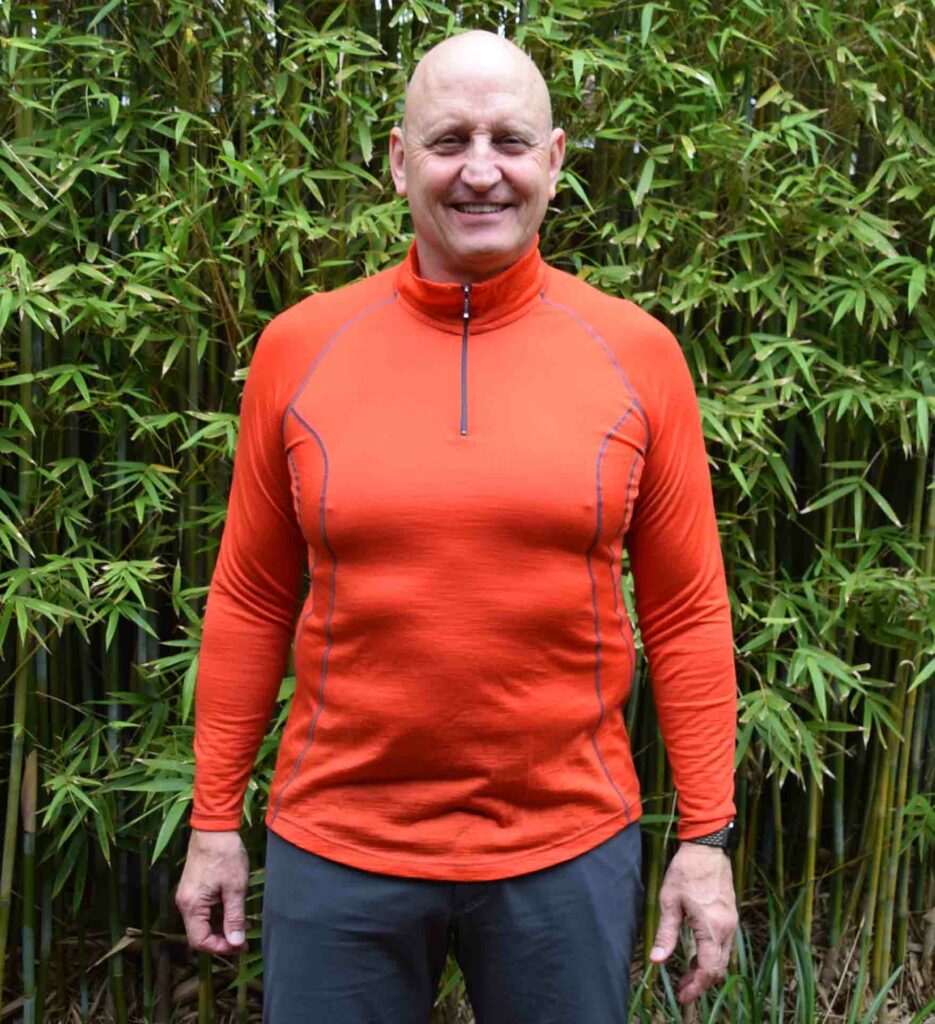
As the name suggest, the mid layer is worn somewhere in the middle of your layering system and is designed to provide extra warmth. This layer is where the versatility of your layering system comes into play. If the conditions dictate, I will add this layer on top of my base layer but for me this means that the temperature is starting to drop well below zero degrees Celsius. Alternatively, I will use this as a warmer version of a base layer. After much testing I am now wearing the Wilderness Wear Fusion 190 Long sleeve Zip Neck Top, which is classed as lightweight (fleece weight of 190). This comfortably goes over my base layer.
I am not a fan of having layers tucked into my pants as I find it’s annoying because the layers shift. So as strange as it sounds, this layer at least for me is often the last layer I put on and the first I will jettison. As mentioned you may be comfortable wearing this around camp but as soon as you start hiking you will heat up and start sweating.
I also use the Wilderness Wear Light Merino 170 Men’s Leggings as my mid layer for my legs but for me it has to be consistently below -4° Celsius to bother with this additional layer. Again, this layer is made of wool and will keep you warm even when wet and make a great pair of pyjamas when its really cold.
In addition to using this layer for warmth I also use it as my ‘town clothing’ on long distance hiking while I’m washing my main clothing. I do wear a pair of lightweight shorts over the top so I don’t scare the locals!
Wilderness Wear Fusion 190 Long Sleeved Zip Neck Top
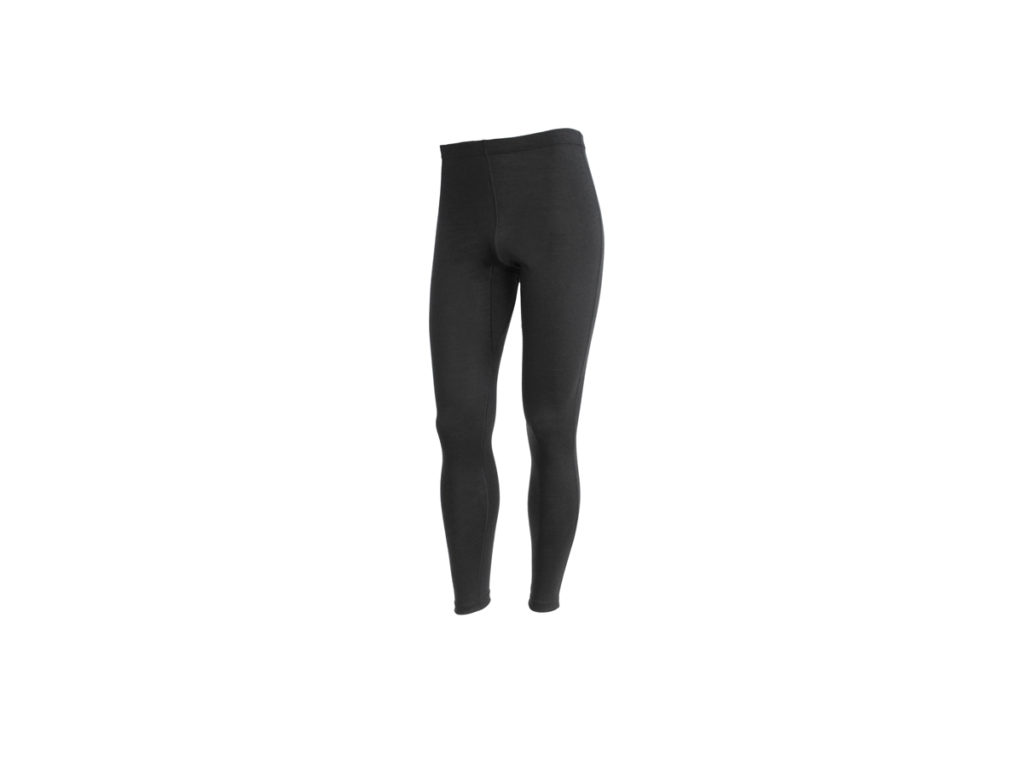
Wilderness Wear Light Merino 170 Men’s Leggings
Insulation Layer
This is the layer you wear when things are getting really cold or have finished hiking for the day and are cooling down, when you are just lounging around the campsite.
The insulation layer will consist of either a down/synthetic jacket or a fleece. My personal choice as the moment is the the synthetic insulated Mens Northface Thermoball Hoodie. Synthetic jackets are more versatile as they keep you warm even when wet. On the downside synthetic jackets or fleece can often be heavier than down jackets,
Down jackets will often have waterproofing technology integrated into them but they are still not made for heavy rain conditions. Down jackets also tend to be lighter in weight.
A number of companies produce hybrid style jackets that use a merino blend insulating material which, like the synthetic jackets, keeps you warm when wet however these jackets are not exactly lightweight when compared with down jackets.
You may only need two layers if its not overly cold and I usually find that this layer typically consists of base layer and my rain jacket as it reduces airflow. I will only tend to use all four layers if its really cold.
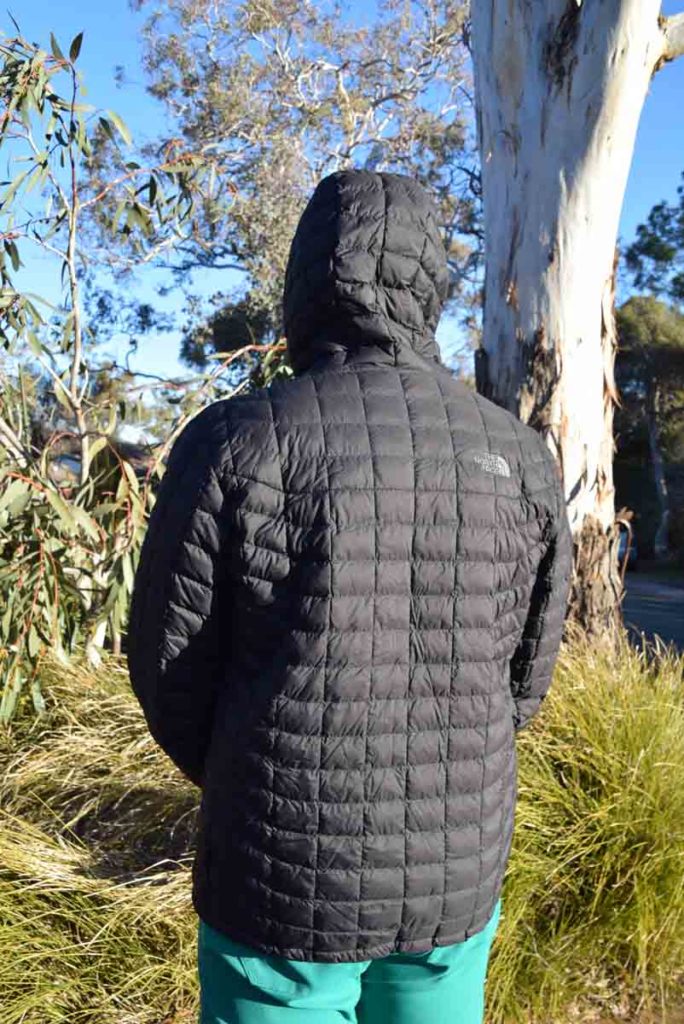
Mens Northface Thermoball hood up rear view. I hadn’t used a hooded jacket before and now love this extra feature
Outer Layers-Wind / Waterproof
The outer layer is as it sounds and provides protection from the wind thereby reducing the issue of apparent temperature and from water, which can often suck the heat from your body very quickly.
This layer forms a ‘shell’ over your other layers and maintains all that wonderful warmth you have built up inside the jacket. Here’s where things become finicky, as these jackets need to be able to breathe so that any moisture or sweat that builds up inside the jacket can escape so that you don’t overheat or sweat excessively. The simple option is to just undo the main front zip of the jacket but if it’s pouring with rain then that is the last thing that you want. This is where armpit zips (or ‘pit zips’) work well as they allow air to escape without compromising your waterproofing. These jackets will have a hood of some type and usually a high cut neck that minimises opportunities for water to enter into the jacket.
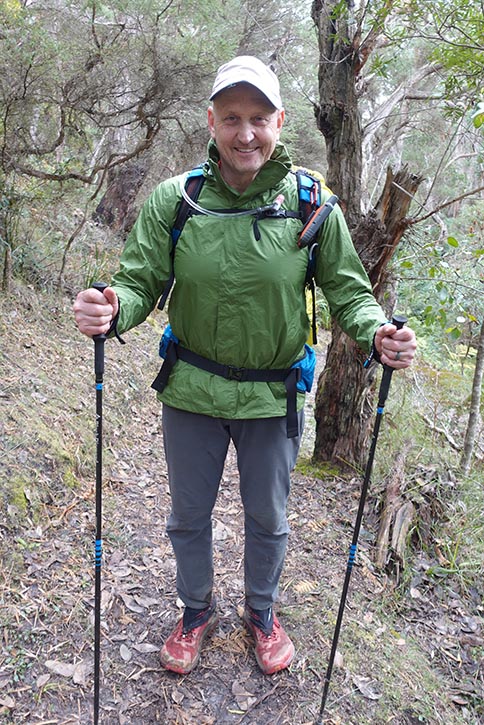
A good example of this layer is the Marmot PreCip Jacket, which is ideal for those wanting to go lightweight (my personal choice). This jacket has seen we through torrential downpours in 100km’hour wind and still managed to keep me dry.
If you want something ultra durable and bullet proof then look at some of the heavier grade jackets made from Gore-Tex®. I do own a Gore-Tex® jacket but rarely use it preferring to stick with my lighter weight Marmot PreCip.
Don’t forget the legs as well. While not as important as keeping your upper body dry it’s still important to keep in mind. I own two sets of rain pants and my personal preference is the cheaper pair, the Rainbird Stowaway pants. The main reason I use these is that the ankle zips open quite wide and allow me to get my clown sized feet in and out of the pants without having to remove my foot wear and this includes the odd occasions when I wear my heavy duty Scarpa boots.
Add Ons
Head/Neck
If you have ever done a first aid course you may remember from the lessons on hypothermia that the head is one of the biggest areas for heat loss. Particularly in my case having no hair means I need to protect my head from sunburn and overheating in hot temperatures, and from the impacts of the cold.
If you are a bit of a traditionalist, a beanie or a balaclava is the way to go and I do own several different ones. While I have gone through stages wearing each of these garments they will usually sit in my cupboard only to be brought out for snow trips.
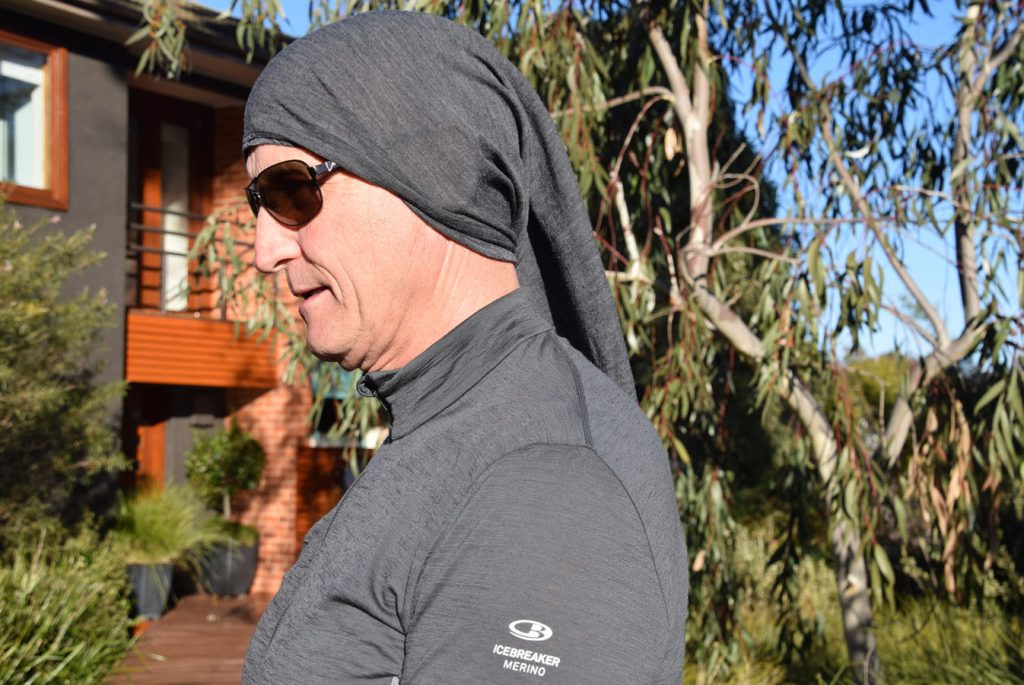
Instead, I prefer to use a Buff; actually two buffs if I’m being accurate. The first buff comes with me year round and is a lighter weight option. This particular item of hiking gear is probably the most versatile piece I own, and even having no hair, a Merino wool buff will keep my head toasty even when its really cold.
Hands
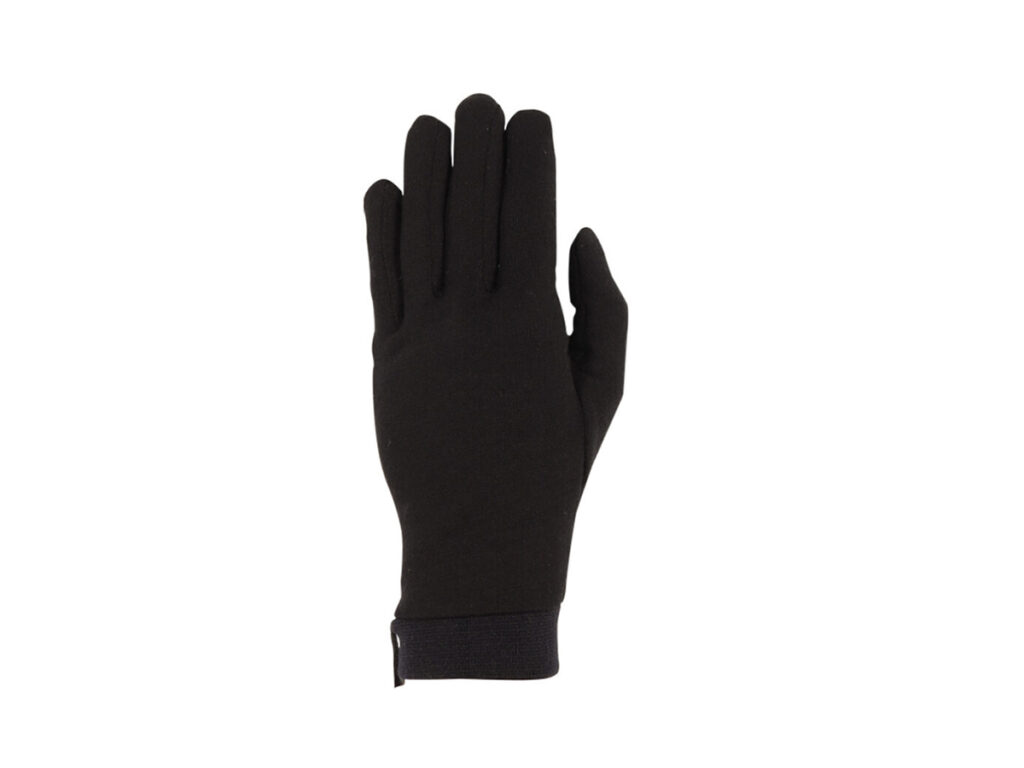
Your hands are also another area you need to consider and while tucking them into a coat pocket is an option; if you have gone past that stage then its time to start looking at some descent gloves. I use a pair of Macpac Merino Liner Gloves to keep my hands warm. They are not waterproof but will still keep your hands warm in the rain if need be but a better option would be to wear a pair of waterproof gloves particularly when it’s snowing.
Feet
Sock choice can be very difficult at times. They need to provide cushioning and keep you warm but they also can’t be so warm your feet sweat excessively. Having worked outside for much of my life, I rarely wear a heavy grade sock. My main sock is currently the Wilderness Wear Merino Multi Sport 4.0 Sock that works for most of the year. If I know I am going to get cold, I will use the heavier grade Wilderness Wear Fusion Light Sock. The only time I will ever wear a heavy grade wool sock is in snow conditions but again this is going to depend on your own individual cold tolerences.

Tim with Australian Hiker Wattle Buff side view

Wilderness Wear Multisport 4.0 Sock
The Final word
The way you use your layering system will be as individual as the garments that go to make it up. In most cases there is no one right way and don’t let anyone tell you otherwise. I will often wear my base layer top and my waterproof jacket without my insulating layer or mid layer. It’s a rare thing so see me wearing all four layers. It really depends on how I feel on the day and what the weather conditions are like. Seek out advice from friends, from books and blogs and from the outdoor stores to help you make your decision on what garments will form your layering system. Start with the base, mid and waterproof layer first and leave the insulation layer until last (if you can) as this is the most expensive bit. Keep a record, written or otherwise, of how each piece performs to help you develop your personal layering system.
Now when you have all your clothing layers sorted, you’ll need to think about where to put all your equipment in your pack – this will be a topic for another day but suffice to say, the last thing you want to do is have to unpack everything to access your layering system!