10 Basic Photography Tips for Hikers
Photography
In a recent article we discussed the reasons why do we hike and for a number of us one of those reasons was photography. I can safely say that I have spent almost 20 years griping about not being able to find the ‘perfect camera’. I’ve been to Egypt and found that my wide angle lens was not quite wide enough to get just the right shot that I wanted of the pyramids. I’ve been to Borneo and found that my telephoto lens was just not good enough to capture the orangutans that were just out of reach. My camera was too heavy, didn’t have a good enough pixel count etcetera ecetera. Essentially what I want is a full frame SLR camera with the weight and size of a compact camera, that fits into your pocket, only has one lens to do everything, perfectly, produces very high quality images, is waterproof, and doesn’t require a second mortgage to purchase. I’ll be happy for someone to identify this mythical camera if it exists. I’m sure one day in the future we will get there.
After coming to the realisation that there is no such thing as the ‘perfect do it all camera’ I finally decided that I either carried a bulky camera set up weighting around 3kg and that took up pack space or else that I was going to have to compromise. My alternative was to pay a Sherpa to carry my photographic equipment on my trips (I have seen this done by the way). Now I know that there are holsters and packs that exist that will place cameras at the ready but they carry with them their own compromises that I don’t wish to make. In the end I decided that what I needed as my main camera was a high quality compact camera that would fit into my pants pocket, or hip pocket of the pack, that I could easily access and for me that was the Sony compact camera range. My SLR has now relegated to shorter trips where I have a specific goal in mind.
Now while the choice of camera plays a big part in the image quality a number of other factors relating to how you take photos is equally important. The following 10 suggestions are just some of the very basic photography tips that anyone can do to improve there on trail photography. For me photography is a bit of an addiction and I’m always looking for that next shot. By no means would I claim any great level of expertise as a photographer but by looking for the right opportunity anyone can produce good images that they will be happy to share with friends and family or that will help bring back the memories years after the trip is over.
1. Do your research
Each and every trip will have something special about it. It might be wildflower season or there may be some amazing mountains. You may also have some particular interest. The type of scenery that you may see or are looking for may dictate what equipment you take with you if you do have a choice.

On the trip I took this image I knew I would have some good macro opportunities so carried my Nikon SLR and a Nikkor 105mm macro lens. It was worth the 1.4kg camera and lens weight
2. Be awake at sunrise and sunset
Sunrises and sunsets are always amazing but when combined with some spectacular landscapes can take it one step further. It’s rare I’m not up before sunrise but for those late sleepers it may pay to get up on the occasions when you when you have the opportunity. Also keep an eye out on the sunsets (collectively known as the Golden Hour). For sunsets in particular you tend to have a short window of opportunity to keep an eye out.

This is one of my all time favourite shots and not one that I expected as I had gotten up to take photos of a totally different mountain in Bhutan. It was worth it to be up this early just to take this image
3. Sssshhh!
Out of habit I tend to talk more quietly when I am in wilderness areas. I didn’t realise it but I listened to a recent podcast I did on a solo hike and it surprised me how subdued my voice was. It’s a bit like being in a church, I think that its just part of the experience for me. But the added benefit of being quiet is that most wildlife will not be sacred away allowing you more photography opportunities.
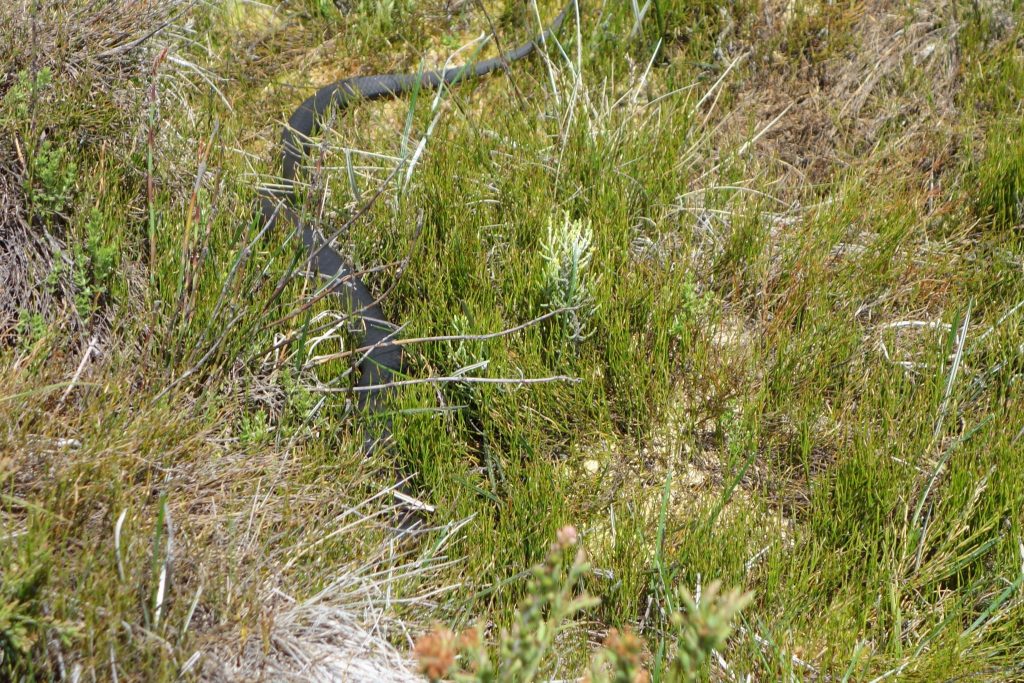
I had my compact camera out of my pocket in a matter of seconds, took the shot and moved away very quietly. This snake never noticed I was there and I was standing only about 1.5 metres away when I took this shot. I had already backed off about 1.2 metres by this stage having nearly trodden on it
4. Look ahead, look back
If you think about when you are driving a car you are supposed to be looking not just straight in front of you but further ahead just in case; with taking good photographs it’s the same. Do I take a photograph now or what will my subject look like in another 20 or 50 metres. If you get it wrong go back, you never have that particular opportunity ever again. Turn around every so often; it’s good navigation practice but often the path will look different because of the angle of the sun or the particular terrain.
5. Go off centre
There is no rule that says that the subject of your photo has to be in the centre of the image as most people do. Sometime it pays to put the subject to one side and this is often what creates that photo with a difference.
6. Be Ready
Have your camera handy. Sometime things happen quickly and if you have to stop, get the camera out of your pack the moment may be gone. Now that I carry a compact camera I can have it out of my pocket and be shooting within 5-10 seconds.
7. Look for the unexpected
Sometimes the best photos are the images you least expect. Textures of tree bark or rocks, particular shadow patterns, or the way that water moves can all create interest.
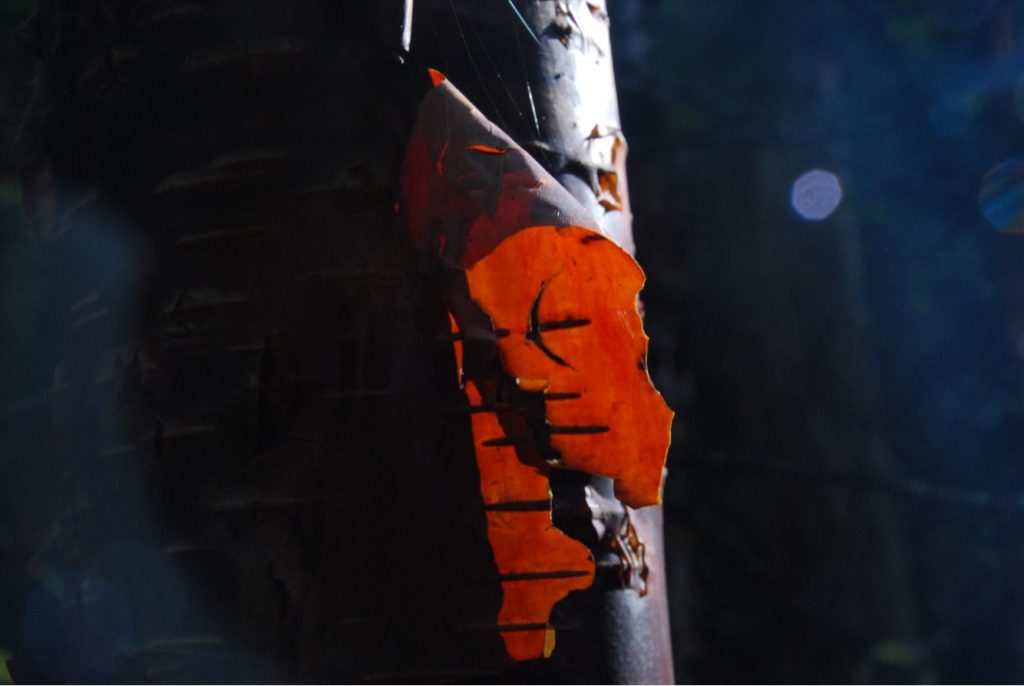
The right light and shade mixture at just the right time of the day. This birch tree bark caught my eye as I moved through some dark forest
8. Carry a tripod or find one
If you want to take photos of the night sky you will usually need a tripod to get really spectacular images as you will often need to use a slow exposure time on the camera which has to be dead still to prevent burry images. I wont carry a tripod on an extended trip but sometimes you can improvise and use rocks, logs, steps or walls to support the camera to keep it steady.
9. Take your time
I’m a bit old school and have always been taught that photo editing is a last resort. The last thing I want to do is to edit 1600 photos after a two week trip. Take a bit of time , line your shot up and you may not have to do any editing at all. In most case all that I do is some minor cropping and when I publishing on the web I will reduce the image size. Very rarely do I do any image adjustment.
Alternatively with wildlife sometimes you don’t have an option when something runs, flys or scampers past you at light speed. In that case set the shutter to just keep on running. In Bhutan I took about 100 photos of the local Blue sheep in a matter of 3 minutes because they wont let you get close. I only used about 5 images and deleted the rest.
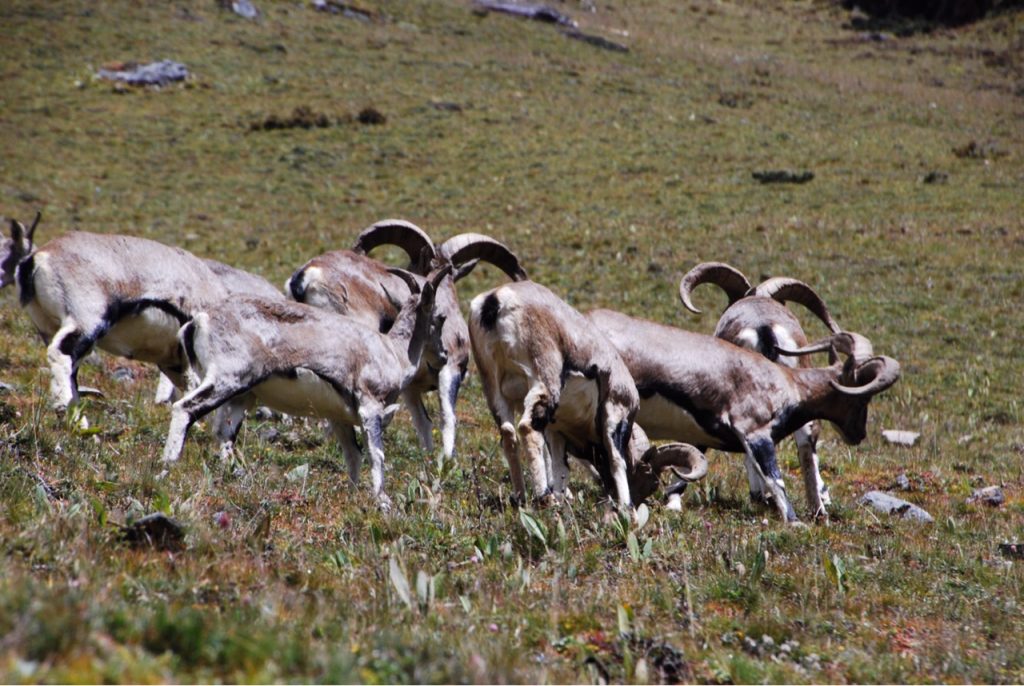
I spent about 30 minutes creeping up on these Blue sheep in Bhutan then just when I thought they were about to bolt I let my camera run.
10. Be candid not creepy
Some of the best people images are those that your subjects don’t know are being taken. I have walked through a crowded market place in India with my wide angle SLR held in my hand with the shutter release button held on looking as if I’m just carrying it. Again I took dozens of photos, all without the viewfinder. I got some terrible photos but also got some really good ones. A word of warning be conscious of what is socially acceptable in overseas countries otherwise you make cause yourself some problems. If in doubt ask before you take a photo.
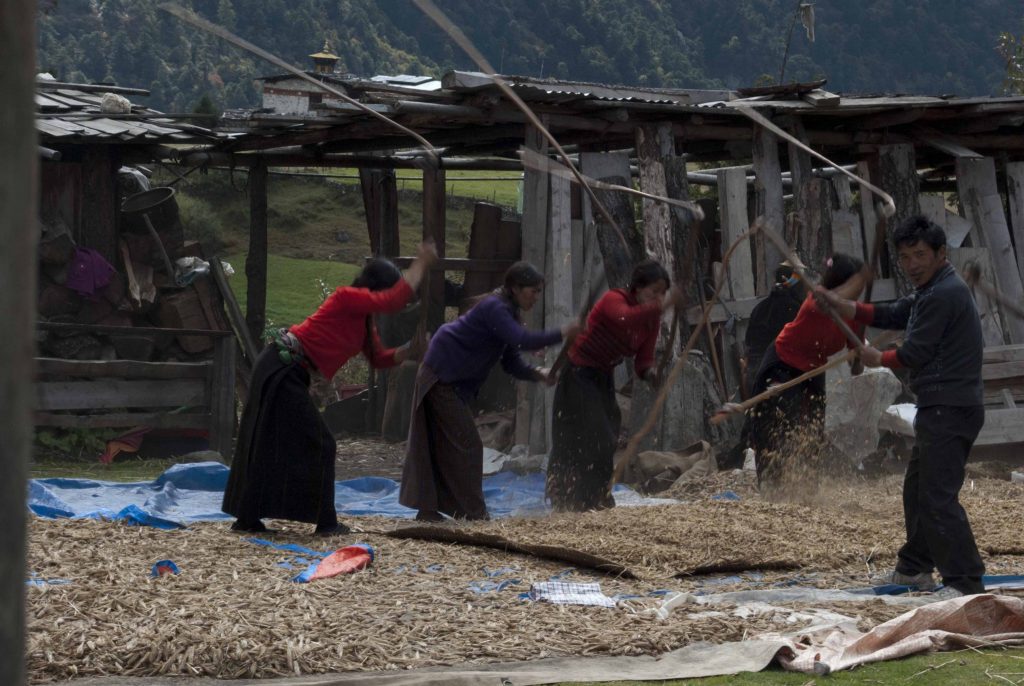
Grain threshing in Bhutan. Real life action that makes the shot all that better