Trekking Poles-Are they worth it?
Hiking Practice
Trekking poles and hiking
I can remember the first time I ever saw someone using trekking poles. It was 2006 and we were hiking in Peru. We had just hiked down from Mount Salkantay and had stopped for lunch when two American hikers came past using trekking poles. My initial thought was what on earth are these people doing – the terrain wasn’t that hard! I didn’t give poles much thought after that, and didn’t for the next six years, persevering with my dodgy knees that punished me every time I walked down hill.
In 2012 after deciding to go hiking in Bhutan I finally concluded that all the mountain descents were going to kill my knees and it was time to bite the bullet and purchase my first pair of poles. While only 11 years ago, the range of poles on the market was limited compared to the vast array that assails hikers in retail stores today. At that time there were really only 4-5 brands and Black Diamond was the dominant one, at least in Australia. After much to-ing and fro-ing I splurged out and bought my pair of Black Diamond Distance Carbon Z Trekking Poles and even 8 years later these poles are still in good condition and still showing not signs of giving up.
After my initial scepticism of 2006 as well as extra age, I’m a believer!
Advantages of using trekking poles
In no particular order:
- Use them instead of tent poles for ultralight hikers
- Some brands of ultralight tents allow you to use trekking poles instead of tent poles thereby reducing the amount of weight you are carrying
- Additional traction and balance provided by extra points of contact
- When it’s slippery or you are walking on a narrow pathway or log, having extra points of contact really helps
- As a selfie stick
- Your arms are only so long and you can tell by the photo if you are holding the camera at arms length. Use the poles in conjunction with some sort of adaptor to hold your camera
- Reduce the impact on your knees when you go downhill
- I have had knee issues my whole life so can’t blame my age for this one. I can walk all day uphill and on flat terrain but my knees complain when I walk downhill. Trekking poles make a huge difference. One of the early studies on pole use found that using poles (two) going downhill reduces the compressive force on the knees by up to 25%. I can definitely vouch for this one
- Reduce the load on your legs going uphill
- Using poles going uphill reduces the load on your legs by approximately 20%. They also ensure you have a more upright gait which helps the back as well as your breathing
- Fend off unruly flora and fauna
- Excellent for pushing plants out of the way and fending off animals if there is no other option
- Test the ground to see how stable it is
- How often have you stepped on what looks like solid ground only to sink ankle deep into mud. I’m sure many of you can relate to this! The poles act as a prod just to make sure
- As first aid gear
- If you are desperate you have a ready made splint
- If you have injured your leg then the poles will take the weight
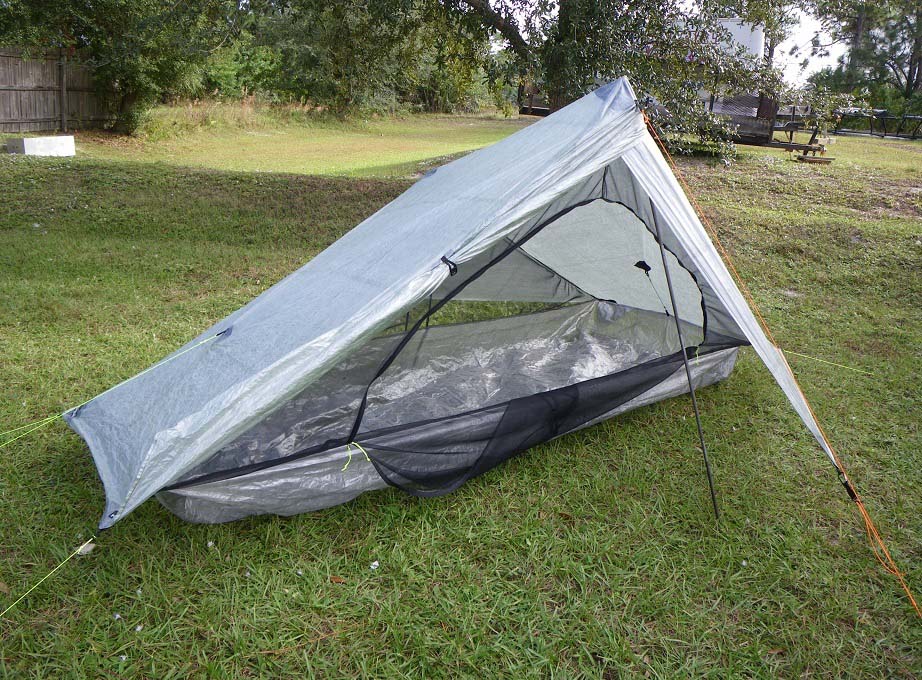
A Zpacks tent with a trekking pole being used instead of a tent pole
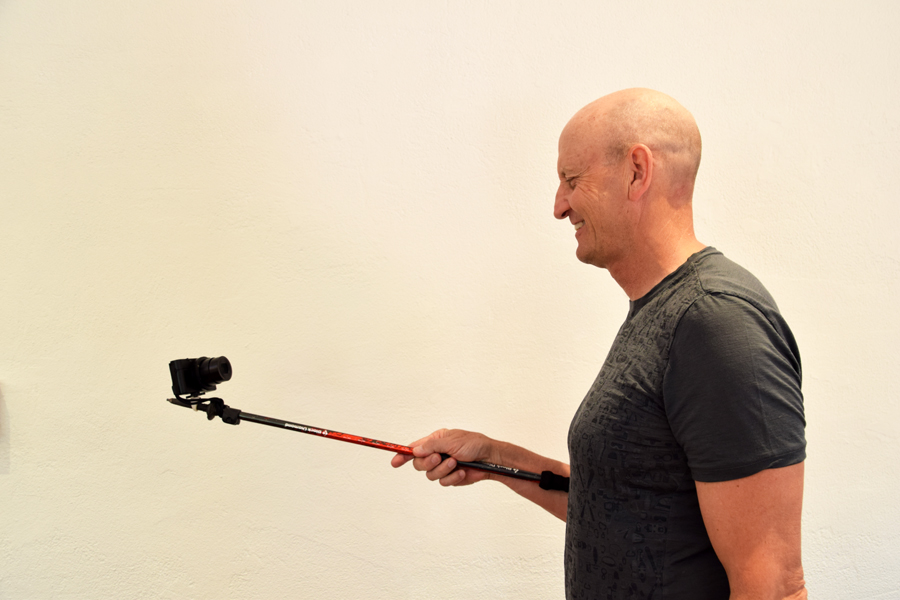
Trekking pole being used as a selfie stick. The adapter connects the camera to the pole

Trekking poles providing stability on a scree slope
Disadvantages of using trekking poles
In no particular order:
- The cost/weight
- Trekking poles usually aren’t free so they are going to impact your hip pocket. Even if you choose the lightest pole on the market you are still carrying more weight. This weight may be offset if the trekking poles are replacing your tent poles
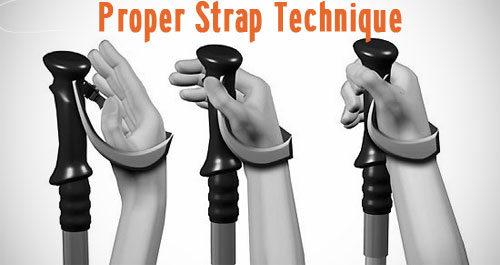
- If you are not using the poles correctly then the benefit is minimised
- Wrist straps should be used. If they are correctly set up you will find the poles will swing without much effort
- Poles should be the correct length with arms roughly parallel to the ground when standing still
- Using poles takes up more space on the trail
- Be conscious of other hikers as you pass each other. And keep an eye out for where you are pointing them – they hurt if you jab someone with them
Buying trekking poles
When purchasing trekking poles there are a number of factors to consider.
- What will you be using the poles for?
- If you are mainly a wintertime hiker then poles that have good snow baskets are needed. A number of poles have the option to remove the snow baskets but usually this means that they are heavier models
- Cost
- Work within your budget. Lightweight is good as long as the poles meet your hiking needs and you can afford them but the cheaper poles while heavier work just as well
- Weight
- Poles will vary in weight with the lightest models usually being carbon fibre. While lightweight, these poles aren’t as durable as those models made out of aluminium
- Size
- In a standing position with the poles in your hands your arms should be parallel to the ground. This length is going to change going uphill and downhill so adjustable poles are a good choice here although will weight more than fixed length poles
- Male or female?
- A generalisation I know but poles sold as for ‘females’ will often have smaller handgrips. These poles will also be suitable for smaller males
- Adjustment mechanism
- Most poles are adjustable and often the adjustment mechanism is personal choice. I have always preferred the lever lock system rather than a twist lock used by a number of companies as I have never had one fail. This is purely a personal choice
- Number of pole sections
- Again personal choice. Three section poles will fold down to a smaller size and are easier to pack. Two section poles are usually more robust but are also longer which can be an advantage when attaching them to your pack
- Construction material
- Carbon fibre or aluminium. Carbon fibre is lighter and more expensive. Aluminium is cheaper and usually more robust
- Hand grips
- Cork versus rubber or foam. Cork handles tend to mould to your hand but again purely a personal preference – I have always preferred foam handles just from the feel of the material
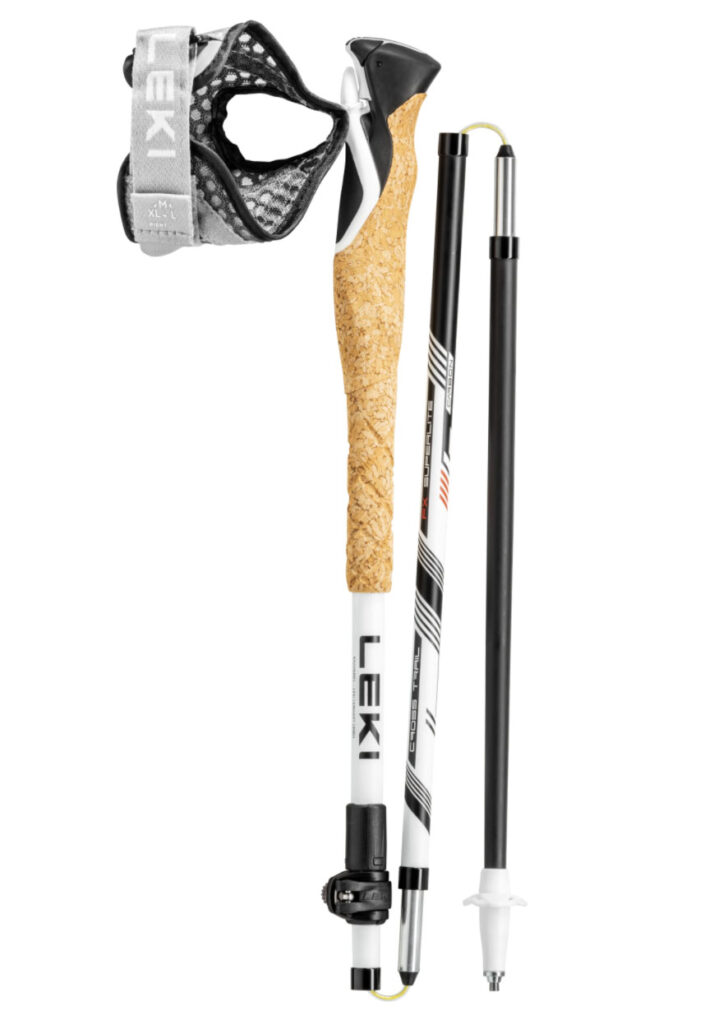
Leki Cross Trail FX Superlite Poles. These poles are a ‘three segment pole’ and also have cork handles which I have now grown used to
Tips for using trekking poles
- Purchase the correct length pole. The pole is at the correct height when your arms are held roughly parallel to the ground when holding them in a neutral position
- Use the pole straps for the most effective use
- Make sure you stow the poles securely otherwise you may loose them
- give them a wash when they have been used near the ocean or in muddy areas
Basic pole maintenance
Trekking poles don’t require a lot of maintenance. When you get back home from a hike, fully extend the poles and wipe them down with a damp cloth removing any caked on dirt or grime. Dry any excess moisture of the poles and leave to dry for a day or so. This will ensure the poles don’t develop any rust or patina that is likely to cause them to jam.
Last words
I typically don’t use trekking poles on short hikes but once I start doing longer day hikes or multiple days they are almost always in my hand even on flat ground. I just find that they also me to get into a ‘groove’ and as such I speed up and at the same time maintain a constant speed throughout the day. I really am a convert to poles and can’t recommend them enough.